Azalea and Rosebud Knits
  • Blog
  • Patterns
    • Hats >
      • Roelle Hat
      • Winterset Hat
      • Design Your Own Hat
      • Valentine Cables Hat
      • Kilbourne Hat
      • Etoile Hat
      • Glenrowan Hat
      • Button box cloche
      • Adora Hat
      • Aster Hat
      • Argyle Cabled Beret
      • Zoey Star Beret
      • Cairo Hat
      • Honeycomb Hive Hat
      • Lakkos Cloche
    • Pullovers & Cardigans >
      • Noemy Pullover
      • Yvaine Cardigan
      • Daiva Cardigan
      • Trail Henley
      • Salisa Cardigan
      • Thara Cardigan
      • Dealla Cardigan
      • Shiloh Sweater
      • Katrina Pullover
      • Liana Cardigan
      • Jocasta Pullover
      • Edythe Pullover
      • Ripple Edge Cardigan
      • Kaleidoscope Pullover
      • Sunsine & Rain Henley
      • Begonia Pullover
      • Climbing Rose Henley
      • Irisa Cardigan
      • Makalu
      • Sinai
      • Sand Dollar Cardigan
      • Nopales
      • Lava Rock Cardigan
      • Sharee Cardigan
      • Annalise Pullover
      • Starbrook Pullover
      • Rosemary Cardigan
      • Alison Pullover
      • Edelweiss Cardigan
      • Minnette Pullover
      • Erte Cardigan
      • Nocturnal Pullover
      • Morrison Cardigan
      • Wessex Cardigan
      • Valhalla
      • Leftovers for dinner
    • Tees & Tanks >
      • Cowesett Tee
      • Janesse Pullover
      • Kayleen Pullover
      • Tiye
      • Dahshur
      • Rhodora
      • Jacaranda Tunic
      • Sakura Tee
      • Sunburst Tee
      • Lindell Tee
      • Adeline Camisole
    • Vests & Shrugs >
      • Elephant Vest
      • Elephant Safari Children's Vest
      • Rimrock Vest
      • Bartram Vest
      • Karnak Vest
      • Dark Lotus Shrug
      • Lancero Vest
      • Aster Vest
      • Olexa Vest
      • Morocco Vest
      • Loretto Vest
      • Camellia Shrug
    • Shawls >
      • Nadina Shawl
      • Janelle Shawlette
      • Nile Valley Shawl
      • Ciara Shawl
      • Emmylou Shawl
      • Graciella Shawl
      • Djoser shawl
      • Desert Waves Scarf and Shawl
      • Blackberry Mist Shawl
      • Mariposa Shawl
      • Technidream Shawl
      • Log Cabin Shawl
      • Rosana Shawl
      • Siren Shawl
    • Scarves & Cowls >
      • Zohra Cowl
      • Esna Cowl
      • Avery
      • Lavienne Scarf
      • Joselyn Cowl
      • Jayda Cowl
      • Raissa Cowl
      • Rosewood Cowl
      • Lilka Scarf
      • Hoptree Scarf
    • Gloves >
      • Roelle Gloves
      • June Mitts
      • Cranberry Mitts
      • Cabled Heart Fingerless Gloves
    • Skirts >
      • Lucine Skirt
    • Jewelry & Other Accessories >
      • Inez Necklace
      • Bettina Headwrap
      • Saqqara Necklace
      • Endira Necklace
      • Lapis Cuff
      • Athena Headband
    • Stash-busting
  • Tutorials
    • Entrelac Tutorial
    • Double Knitting tutorial
    • Honeycomb Cables without a cable needle
    • Twisted stitches tutorial: k1tbl & p1tbl
  • eBooks
  • About
  • Contact

Sewing project: Button-up shirt McCalls 6649

4/6/2016

0 Comments

 
I have two very bad habits when it comes to sewing: First, I don't sew consistently so months go between projects and I lose all my skills, and second, after I cut out a project weeks, months (or in one case, years) go by before I actually sew it and the weather has completely changed into a different season.

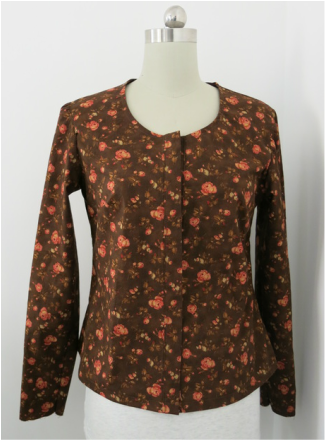
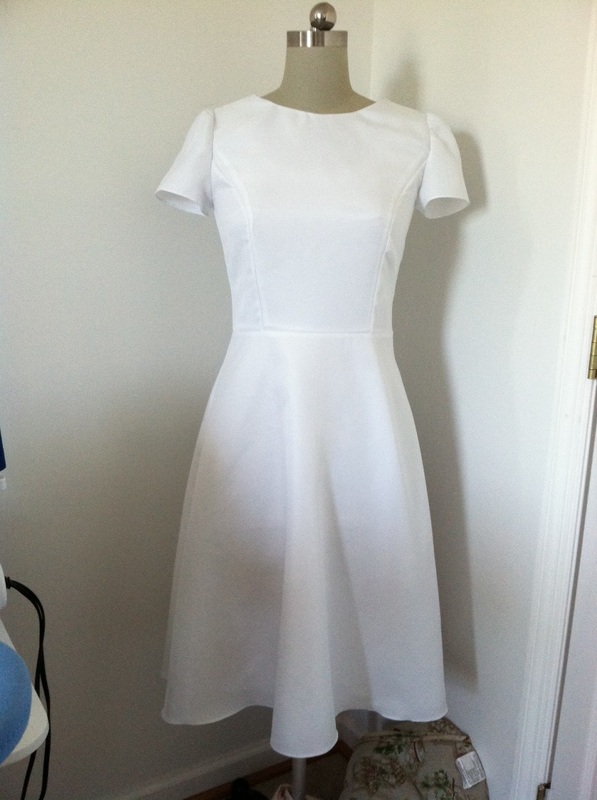
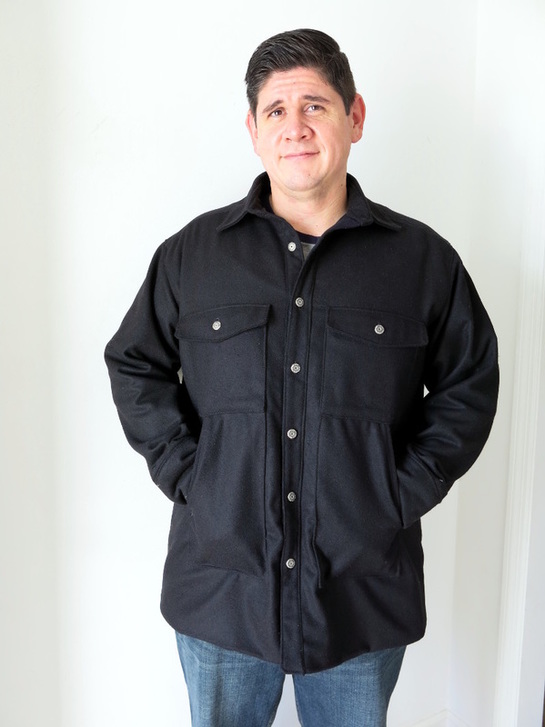
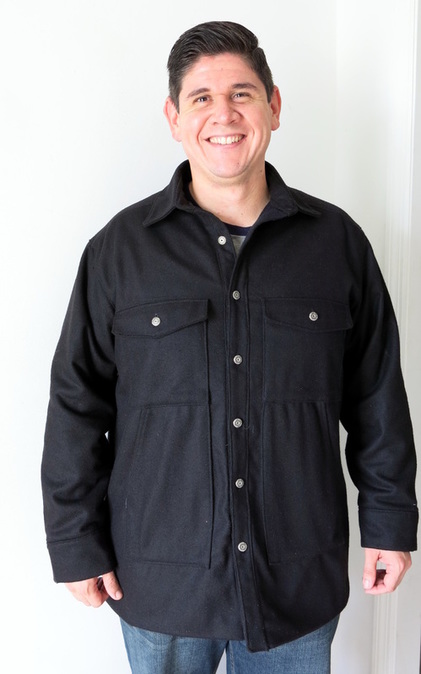
I cut out this long-sleeved button-up shirt in early March back when it was still cold.  The weather warmed up quickly and I thought oh well.  But we're back down to cool temperatures (even a frost last night), so in three sewing sessions I made this shirt and plan to wear is tonight.
Picture
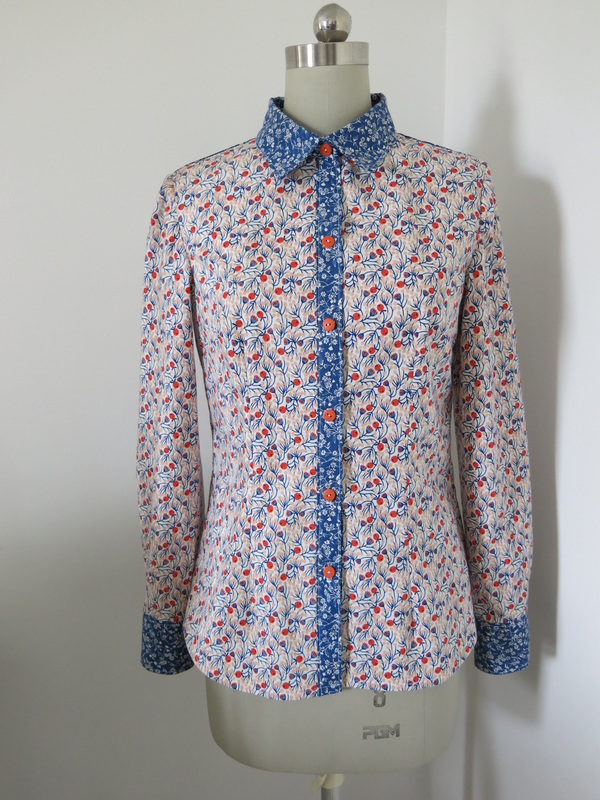
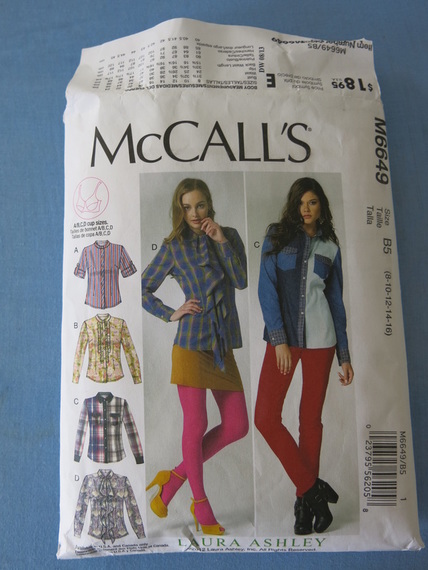
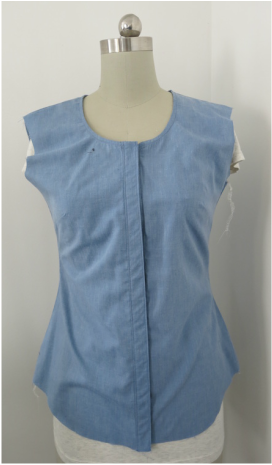
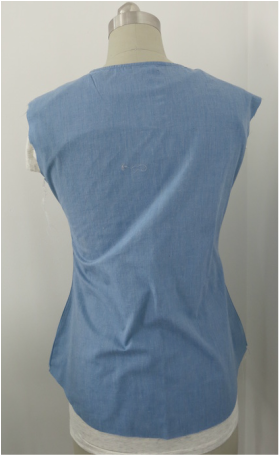
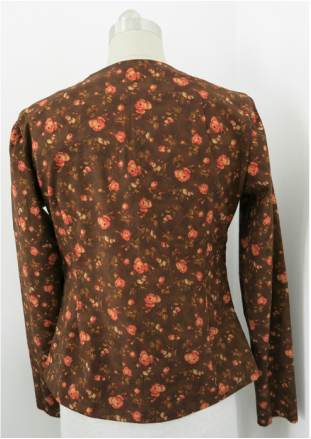
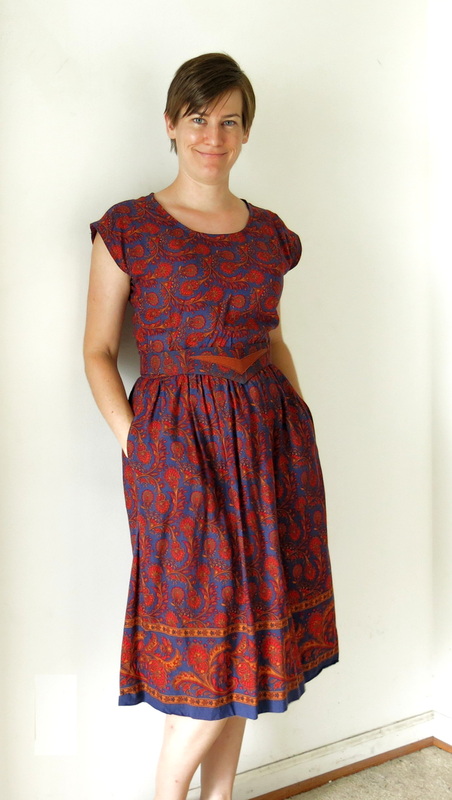
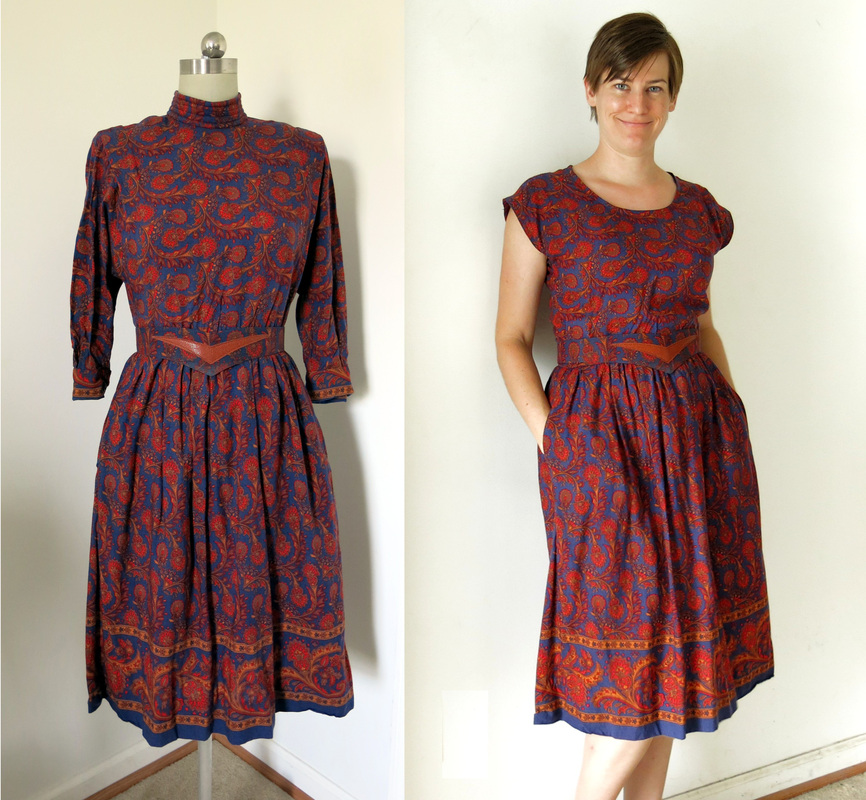
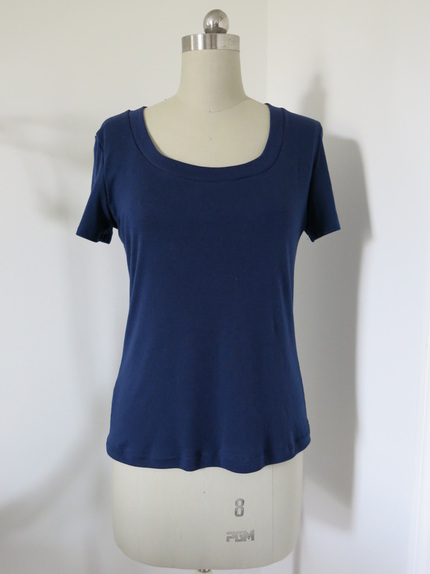
The pattern is McCalls 6649, and I basically made view C but without the chest pockets.  I measured the pattern in all my 'problem areas' (shoulder width, armhole, waist) and found that a straight size 12 should fit me fine.  I was actually surprised in the end just how well it fit; there was no gaping at the armhole, which is always a big problem for me.

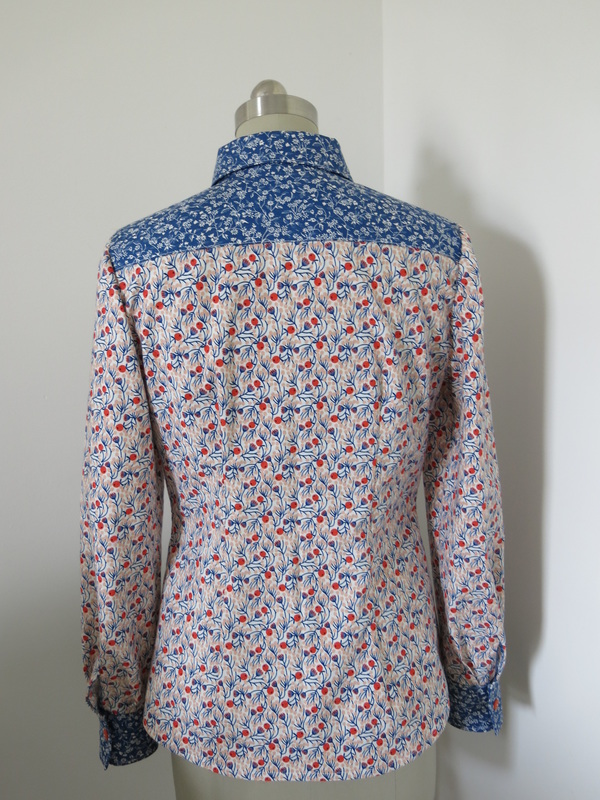
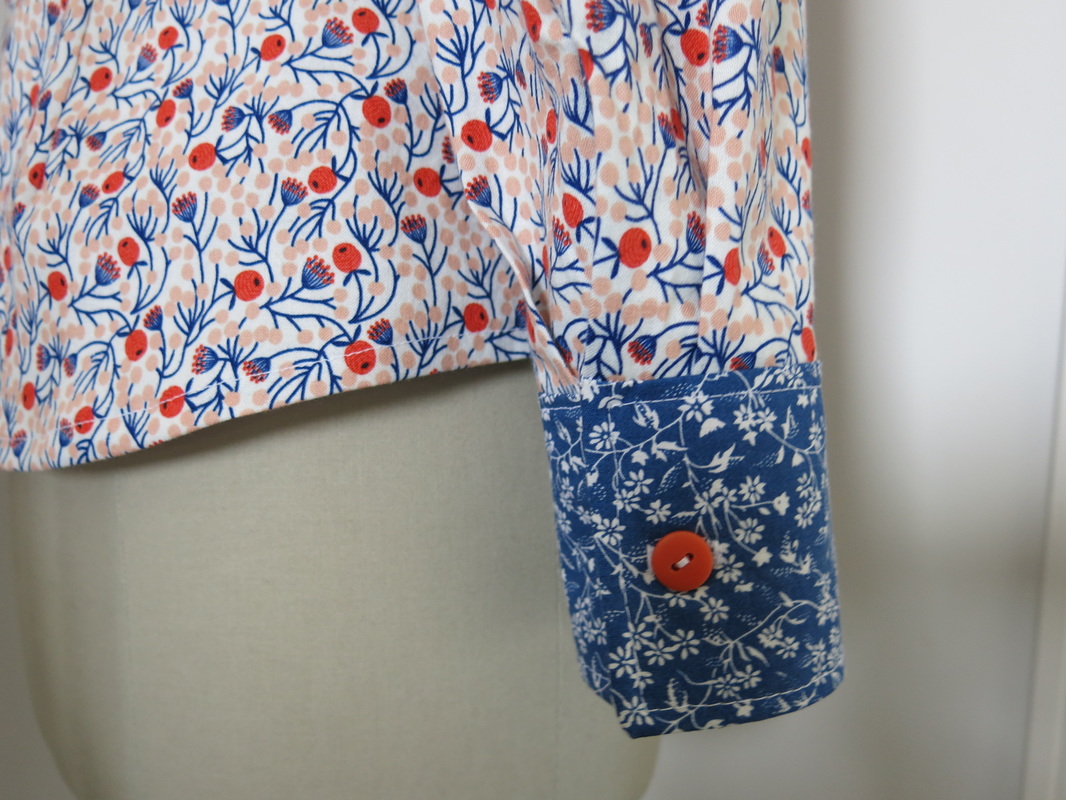
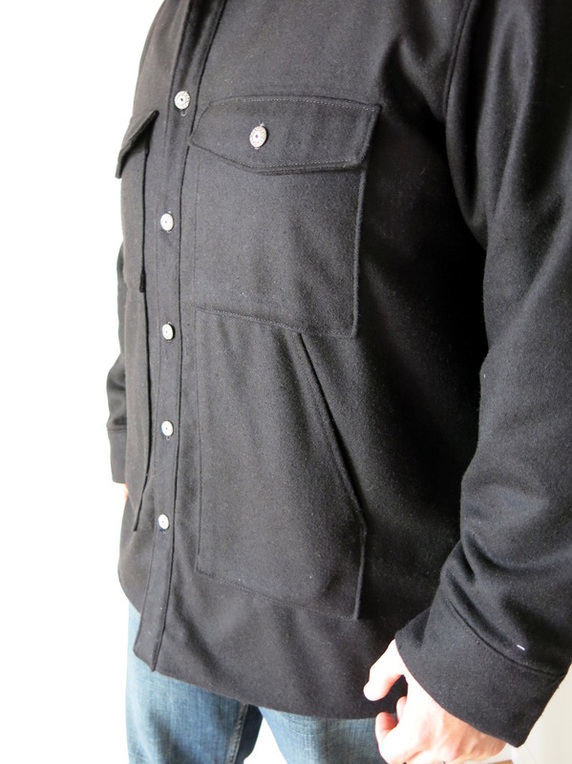
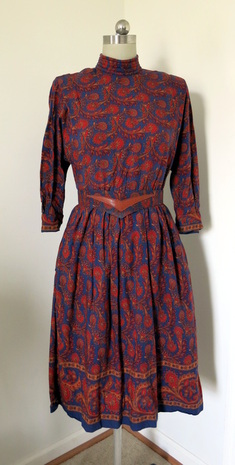
 I used two quilting fabrics, which I know is a hotly debated topic in the sewing world.  I think the quality of the quilting fabric makes a huge different; the 'premium artist brands' feel so much softer and don't seem to fade as quickly as the cheap store brand.  I really like color blocking on button-ups, so I had fun going through my stash until I found this navy and white floral print.  
Picture
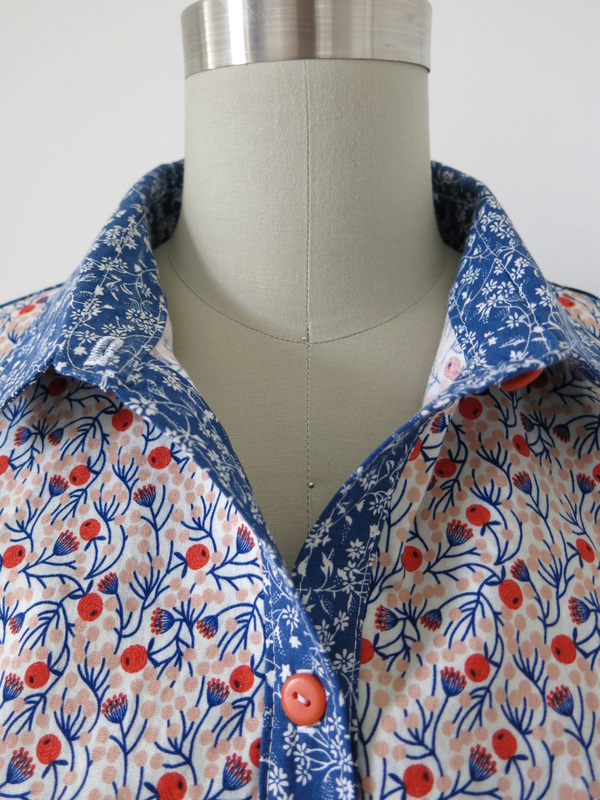
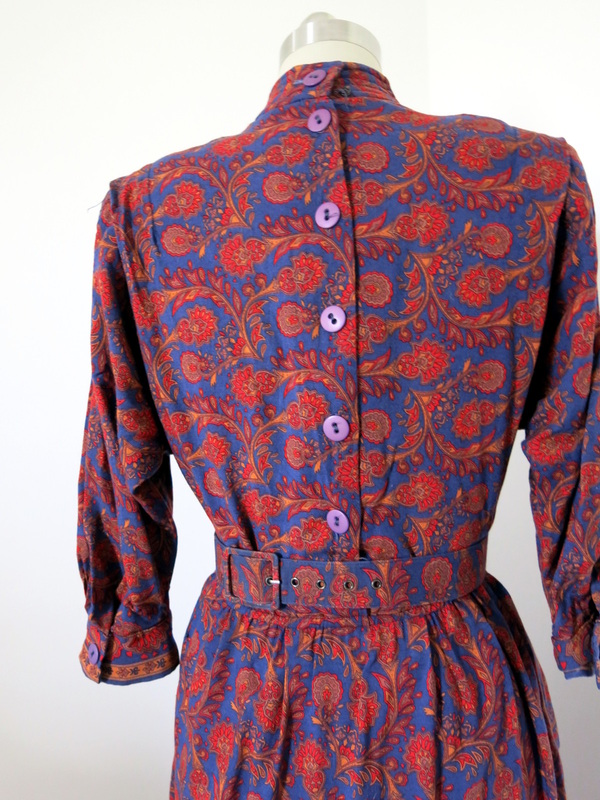
My projects seem to turn out their best when I totally ignore the sewing instructions and turn to knowledgeable sewists who sew in a very professional way.  Most of this sewing was straightforward, but when it came to sewing the collar and collar stand, I turned to my book Shirtmaking by David Coffin.  

​His method of sewing the collar looked like it would produce a much nicer result, but the included illustrations were a little vague to me.  Luckily, I found the tutorials for the Granville shirt on the Sewaholic website, and Tasia seemed to be following the same book.  Her instructions and photos were very clear and helped produce a very nice collar and stand that was symmetrical, and I didn't even cry during the sewing process.
Picture
Picture
My only disappointment was that I used cheap Pellon interfacing from Joann and it feels very cheap and stiff.  I did some research and found that the sewists I admire use interfacing from Fashion Sewing Supply.  Today I ordered three different types/weights, so we'll see on my next project if it makes a big difference.
Picture
0 Comments

Oakridge Blouse: The Fit Disaster

1/19/2016

1 Comment

 
I find myself in need of nice long-sleeved blouses, and I just fell in love with the Oakridge Blouse pattern when it was first published by Sewaholic.  I'll begin by saying that I found the instructions of this pattern very clear, and the illustrations helpful.  My problems are all due to fit.   

I was very confused when I tried to determine which size I should cut.  Through a bit of research, I found that Sewaholic patterns are designed for a pear-shaped figure.  I'm definitely the opposite (broad shoulders and muscle due to weight lifting), so I had to alter the pattern a bit to incorporate a couple sizes.  I looked more to the finished measurements than the body measurements for choosing the size, and decided on a size 6 through the shoulders and armhole and a size 4 for the body.

My 'muslin' was made from blue chambray I've had in my stash for years, and I was hoping that my pattern alterations would be good enough to make a wearable garment.  I was wrong, oh so very wrong.
Picture
Picture
My dress form isn't exactly my size, but close enough to demonstrate the fit issues.  I had some major armhole gaping and the sharp curves of the side seams made big wings over my hips.  I even took in 1/2" over the hips after sewing the first time, and still they were winging out badly.  Looking at other people's projects, I found that many people found the sleeves extremely long.  I pinned in the sleeve, without the cuff, and realized that it would have been the correct length if I didn't attach the cuff.

So I continued on, making major alterations to the pattern pieces.  To fix the armhole gaping, I followed the advice from this blog post by Sew Country Chick, and added to the existing bust dart.

I also smoothed out the curve in the waistline and hips by filling in 1/4" at the waist, beginning below the bust dart,  I removed 1/2" from the hip at the hemline and made sure it was straight for about an 1" above the hem and blended up to the waist.  

I didn't like all the fabric bunching up on the back, due to my having a rather round posterior, so I added in some back darts for a bit of shaping.  

​I decided to give myself an option of a sleeve with no cuff, so I just added 1" to the sleeve piece to make a hem.
Picture
Picture
The fit on the second muslin is much better.  The armhole gaping is gone and the side seams fit more smoothly on my body.  The back darts were a good idea, but I made them far to close to the side seams.  I removed the shirttail, thinking a plain hem would be easier to sew, but I think it removes some of the beauty of this design. 

I'm really terrible at setting in sleeves.  I tried crimping them, which I know should technically work, but for some reason my sewing machine just doesn't crimp the fabric well.  I was pressing hard with my finger, and it just didn't work.  Not sure what I was doing wrong, any suggestions are welcome.  

I used quilting fabric for the second muslin, which I know it a hotly debated topic.  While this blouse fits, it doesn't hang very well and it seems to just scream homemade.  I think the next one will be the winner, and I'll be sure to use some sort of soft and drapey fabric.
1 Comment

2015 Project Review

12/31/2015

1 Comment

 
It feels like I didn't get as much knitting done in 2015 as I usually do.  I was busy with stuff at church, and at the request of my husband I decided to not knit in the evenings.  At first it really bothered me to just sit and not work on anything, but I kept reminding myself that rest is important too.  So here is what I completed:

​January
Picture
Kaleidoscope Pullover
February
Picture
Edythe Pullover
March
Picture
Nadina Shawl
April
Picture
Jocasta Pullover
Picture
Zohra Cowl
Picture
Picture
Picture
Bettina Headwrap
June
Picture
Shiloh Pullover
July
Picture
Quilt for Leighann
Picture
Lucine Skirt
August
Picture
Janesse Pullover
September - Whoops, looks like life got in the way and I didn't finish anything!

​October
Picture
Katrina Pullover
November - I spend this month working on secret projects that you will see next summer.  Shhh!!!

​December
Picture
Aaron's wool and flannel jacket
May
1 Comment

Sewing project: Wool & Flannel Men's Jacket

12/30/2015

1 Comment

 
Picture


Over the years I've limited myself to making Christmas presents only for the closest people in my life.  Less stress and it seems more meaningful to give a handmade present to someone whom I know will appreciate it.  My husband is going to spend quite a bit of time in the next few months in a cold climate, and since he doesn't have a proper wool jacket I figured it was high time I make him one.

I've never sewn with wool before, so this project was an adventure for me.  I did a bit of reading about sewing with wool, and the big tips were: use a press cloth, and use lots of steam.  

Fabric:  black Italian wool blend from Mood Fabrics, and black cotton flannel from my stash.

Pattern: Simplicity 1328 view A with some modifications.  

Modifications: The pattern is for an unlined jacket with a doubled yoke and buttoned shirt cuffs, and I wanted to add a lining for extra warmth.
  • I eliminated the shirt cuff with placket (it would have been difficult to sew and too bulky), and instead made a plain circular cuff and re-drafted the sleeve pattern to make it narrower at the bottom.  
  • I eliminated the side vents.  
  • I find sewing in linings very confusing, so I did a lot of thinking about which method would be easiest.  I sewed both outer and lining of jacket separately and stopped before adding the shirt placket and collar.  I pressed up the 1-1/4" hem on the outer layer, then sewed the outer layer and lining together at the hem only with a seam allowance of 5/8".  I re-pressed the hem again allowing the lining layer to bag down as it would on any other lined jacket.  I then basted both layers together at the center fronts, neck, and cuff edges and treated them as one layer.
  • I added more topstitching than called for in the pattern, as I think it makes the jacket look more professional.  
  • I also added bar tacks at the bottom of the pocket openings for extra strength, because of course the first thing my husband did was shove his hands into the pockets, and I envision him shoving his cell phone, keys and wallet into the pockets as well.

​Project Notes:
  • Always make a muslin.  It doesn't have to be the entire thing, just make sure the body has a good fit.  My husband has a massive rib cage and shoulders, so I made a very silly looking muslin of just the body out of some obnoxious quilting fabric just to make sure it wouldn't be tight in the chest. 
  • It's easier to spray the press cloth with water and to constantly refill the iron with water.
  • Hand basting is more accurate than pinning, and while it takes just a bit longer it saved me lots of frustrated and ripping out seams.  I hand basted the pockets to the body, and the turned under edge of the collar.  I cheated a bit and used quite large stitches (1/2 - 3/4"), but it was still much better than pinning.
  • When ironing very thick seams (mostly in the layers of the collar), use a clapper (or in my case, the bottom of a point presser) to press down hard and compact all those layers of fabric.  

It would have been nice if this project had been a complete surprise to my husband, but realistically it was much better for him to try on the muslin and the body of the jacket as it was in progress.  It wouldn't have been a good surprise if it didn't fit!
Picture
Picture
Picture
1 Comment

Vintage Dress Restyle

9/6/2014

0 Comments

 
Finally, I have something to share!  Friends and family have kept me busy (in a good way) for the last few weeks and I feel like I've been struggling to get anything crafty done.  A couple months ago I found this dress at the thrift store.  
Picture
A little too matronly for me. But what an awesome border print!
Picture
Button-up back? Really? My elbows don't bend enough to get those middle buttons.
Immediately I fell in love with the vibrant print and the cool belt, but didn't really care for the style.  It is a total '80s dress complete with shoulder pads, giant dolman sleeves, and a turtleneck.  But I could see that this dress had potential.  And for just a few dollars I was willing to experiment.  I have never tried to restyle anything, but I was willing to give it a go.

I took it home and gave it a good inspection.  I discovered that the belt was several inches too small; which made me realize that this dress is probably an x-small and meant to be oversized.  

I unpicked the release tucks in the shoulder area and found that I would have enough fabric to shape the body into small extended cap sleeves.  I carefully cut off the turtleneck, being aware of the button placement, and changed it to a scoop neck.  I finished the neck edge with single fold bias tape.  I tried on the dress and pinned the placement for the new side seam and extended cap.  After several try-ons I got the fit just right.  The finished the sleeve openings with a narrow hem.

The belt was not so easy to fix.  I cut off the buckle and grommets to make a symmetrical piece.  I tried doing a whole thing with elastic in the back but it didn't work out, so I ended up using the sleeve fabric to make ties and carefully sewed them to the front belt piece.  I say carefully because on the first try I was not careful, and my machine fell apart trying to go through the plastic belt backing.  Whoops.  After using the World's Smallest Screwdriver to put my machine back together, I removed about 1/2" of the backing on each side and sewed through just the fabric.

And now for the final dress....
Picture
Ta-da!!
Pretty snappy, eh?  I really like it now.  Let's compare before and after: 
Picture
Looks much more like a 40's housedress now, and that is much more my style.  
0 Comments

Coverstitch success!

7/22/2014

0 Comments

 
Picture
My coverstitch machine arrived, and has already been put to much use.  I was so excited to see the UPS truck!  After unpacking everything (and what a full box it was!), it didn't take long before I was able to get the machine going.  Of course I read the manual first.  Then, I dumbly ignored the voice in my head, and instead of re-threading the machine from scratch I knotted onto the sample threads.  BIG. MISTAKE.  The looper thread wasn't threaded properly, so my test swatch got sucked into the machine.  I learned very quickly that when coverstitch goes bad, it goes REALLY BAD.  As in, spending an hour getting the fabric unstuck from the feed dogs bad.  Apparently you need three different screw drivers to remove various parts of the machine, so my husband very kindly gave me a tool set so that I would stop bothering him.  Added bonus there!  I finally realized that there is a knob inside the machine that would help release the fabric next time it gets stuck.  And I'm sure there will be another time in the not-so-distant future that it will get stuck.  But, once I got the threading correct, it was lovely!
Picture
By using a different color thread for each position I was able to get a good idea for how the coverstitch is formed.  Now I'm thinking that it would be interesting to use different thread colors on a plain tee or skirt.  Hmmm.....

My first project to employ the coverstitch machine was another Anna Cross Over Bra.  I can't seem to have too many of these!  I'm finally getting good at applying the lingerie elastic.  I used coverstitch on the cup seam to hold down the seam allowance and make a nice top stitching, and also on the side seam to hold both layers of the seam allowance on the back portion.  I thought this would be similar to the finish on commercially sewn bras that helps keep the sides firm and flat.  Do you see that my thread is actually ivory?  This is why we don't choose thread at night with poor lighting.  Mea culpa.
Picture
Picture
Next I did the same for a black Anna Cross Over Bra.  I've been very lucky in my fabric shopping lately and have found lots of nice knits in the remnant section.  Since these bras only use a bit of fabric (pattern says 1/2 yard, but I think for my size it is more like 1/4), most remnants I find are big enough to make one if not two bras.  I bought this black fabric without looking too closely at the label.  I thought it was a lightweight ITY, but it turns out to be swimsuit fabric.  I thought I'd try it anyway, and I really enjoy wearing it.  The fabric is very soft and slinky, and works well under my tees.
Picture
The last project was a tee for my husband.  After my last big fabric purchase, he mentioned (in a somewhat annoyed voice) that I haven't sewn much for him.  I took this as a subtle hint that he wanted something he could wear more often than the smoking jacket I made him for Christmas.  I bought a Kwik Sewn men's t-shirt pattern and went to work.  I used a nice cotton/poly interlock that I found in the mill-end table at Hancock Fabrics.  It turned out slightly big (I guess husband is between two sizes), but he likes it very much and wore it immediately.  I didn't manage to snap a photo before he went outside to grill dinner, so all I have a picture of the coverstitch.
Picture
I'm very particular about matching the fabric and thread colors, which I guess comes from my years in the fashion industry.  Of course, there is a very limited selection of serger threads, and I haven't figured out yet if my coverstitch machine can use regular sewing thread or not.  The burgundy thread I bought was close, but not close enough for me to use as the stitching on the outside.  So when that happens, I usually decide to use a totally contrasting color rather than make it look like a bad match.  In this case I used black, and I think it looks nice.

I promised my husband I'd make him a woven button up shirt, so more coverstitching will have to wait a bit.  Until next time, happy crafting...
0 Comments

Sewing fail: Flatlock and Double Needle Hem

7/9/2014

1 Comment

 
Picture
Ever since I started working out and gaining arm muscle, my store bought t-shirts have become too small in the sleeves and armhole.  Nothing drives me more crazy than a too-tight armhole digging into my armpit.  The next time I bought shirts I went for a medium, and still the armholes were too tight-- I guess the fit models used by Target have no biceps at all.  I'm not even close to looking like a body builder, and I thought it would be ridiculous to buy a size large and be swimming in fabric just to get the right fit in the arm.  So, as usual, time to make my own.  A t-shirt should be easy enough, right?  Finding a simple t-shirt pattern though proved to be a challenge.  I ended up with a Kwik Sew pattern and was quite pleased with it.  

{As a side note, I also bought a Kwik Sew men's button-up shirt pattern, and there was none of that silly handsewing and endless staystitching that also drives me crazy.  I might be a convert to Kwik Sew patterns--they cost more, but they are geared more towards professional finishing.}  

So sewing my t-shirt went quite well until I got to the hems.  I really wanted to flatlock them.  Now... my serger and I have never gotten along well during the 11 years of our relationship.  It takes me hours of swatching to get a balanced tension, and it involves much shouting and flinging of fabric across the room.  After about three hours, I thought I finally had a nice looking flatlock.  I hemmed the whole t-shirt, only to find that something went wrong with the lower looper thread and the whole thing fell out.  More adjusting, and tried to hem it two more times only to have the same result.  Lots of wasted thread and with high blood pressure I finally threw in the towel for the day.

The next day, with a much more calm demeanor, I dragged out my old beat-up Brother sewing machine since my cheapie Singer doesn't have the option for double needle stitching.  I fiddled with the tension and got it to work somewhat.  I thought it would be ok, so I stitched the hem for the fourth time.  It turned out decent, but one of the threads kept skipping stitches.  Yikes.  But by this time I was tired of the whole thing and just went with it.  It isn't too noticeable, but the hems aren't as stretchy as I would like.   
Picture
After some contemplating and bouncing ideas off my husband (who does know how to sew, strange enough), I decided to invest in a cover stitch machine.  I like sewing with knits (so far), and knits seem to be what I wear the most of anyway, so it makes sense for me to sew them.  I've made the lofty goal for myself to try to make all of my own clothes.  I know I will still have to purchase some complicated items like jeans, structured bras and probably jackets, but now with a coverstitch machine I can make durable and professional looking clothes.  

I ended up ordering a Brother 2340CV from Allbrands.  I've ordered from them in the past and was pleased with the service, and I took advantage of their package deal to get all the attachments, plus thread, 100 needles, and a carrying case.
Picture
So I plopped myself down and read the manual, then bravely attempted to sew some coverstitch.  I know I should have just threaded the machine from scratch, but I attempted to tie on new threads like I do with my serger, and it ended up being a disaster.  My first attempt at sewing ended up sucking the fabric down into the feed dogs and got stuck.  Before I even made a proper stitch, I learned how to take the machine apart using three different screw drivers--yeah, thanks Brother, my husband thought I was nuts when I came back twice asking for various tools.  Finally he just handed me the whole tool box.

The problem ended up being a misthread for the looper, so it was easily fixed once I was able to get the fabric unstuck.  Then moments later.... TA DA.
Picture
Lovely 4 thread 3 needle coverstitch.  I think I will generally use 3 thread 2 needle in the widest width, but figured out I try it out this way first.  LOVE IT.

Tomorrow will be time to cut out another t-shirt!!
1 Comment

DIY Fabric Weights

6/28/2014

0 Comments

 
Last week I happened to see a new sewing book at my library, Me & My Sewing Adventure by Kate Haxell.  Being a sucker for sewing books, of course this one (and five others) came home with me.  Along with very useful information on sewing different seams, finishes and trims, there are instructions on how to make your own fabric weights.

I have heard over and over again that using weights to hold down your pattern is better than using pins, since pins can distort the pattern somewhat.  But finding pattern weights is another story.  The only ones I have been able to find were made by Dritz, and were $13.99 for 4!!  I bought them grudgingly, even with my 50% off coupon I thought they were expensive.  I tried to think of how to make them myself, but couldn't come up with any great ideas.  When four weights didn't prove to be enough while cutting out a pair of pants, tomato sauce and salmon cans had to step in but were awkward to cut around. 

So, then I find this sewing book, with the suggestion to use a stack of 3 large washers wrapped in fabric to make your own fabric weights.  While I do have lots of scrap fabric, I have even more teeny tiny balls of yarn that I just don't have the heard to throw out.  Perfect project for only a few yards of yarn!
Picture
Luckily, my husband was already on his way to the hardware store, so I asked him to buy me the biggest washers he could find.  He came home with these-- the box says 5/8", but they were huge so I'm guessing the 5/8" is the size of the hole in the middle.  Can you tell I'm completely hopeless with tools?  

I made the light pink weight first, and using only one strand of yarn seemed to take forever to wrap.  So I started to use two and three strands together and it went much faster, and also turned out much more colorful! 

The box of washers was somewhere between $6-7, and I already had the yarn, so I think that is a pretty good deal for 9 fabric weights.  I can't wait to use them!  I'm off now to cut out my first knit t-shirt...
0 Comments

Anna Cross Over Bra by Ohh Lulu

6/26/2014

0 Comments

 
It gets hot here, very hot and very humid.  Last week it got up to 100 with about 80% humidity and when I stepped outside I felt like I was suffocating.  I did a quick run to the grocery store, and by the time I got home my clothes were soaked.  Not fun.  Especially not fun was the feeling of my bra being a wet sponge.  What to do?  Time to find an all-cotton bra.  I soon found out this was not an easy task; the only thing even close in the stores were sports bras, which don't look so great under a tee shirt.  So, time to make my own.  

My initial search only resulted in patterns for highly structured underwire bras.  As fantastic as it would be to make a custom fit bra, I am not really willing to put in the time and effort for that much construction.  I wanted something simple.  Eventually I came across Ohh Lulu's lingerie patterns, both on Etsy and Craftsy.  Very cute, vintage-style bras and underwear.  Even though there weren't any projects or reviews, I decided to try out the Anna Cross Over Bra. 
Picture
First attempt, learned what not to do.
Picture
Second attempt, much better!
The instructions:  Now, the description of the pattern is very upfront about saying that you need to have experience sewing with knits and applying lingerie elastic.  I have little-to-no experience with either, so I knew some YouTube videos were in my future. 

The pattern:  The sizing for this bra threw me off a bit.  According to the pattern I would need an x-small.  I haven't been an x-small in anything since I was in 8th grade, so I didn't trust the pattern and cut a size small instead.  Big mistake.  While my bra is wearable, the cups are really big.  

For my second attempt I used an x-small and the fit is much better.  Near the end of the instructions, when sewing on the straps, it says to use the star symbol on the back pattern piece to align the edge of the strap.  I looked twice and couldn't find any star symbol anywhere, so I had to make it up.  Before I made my second attempt, I was able to email the designer and she sent me a very polite and prompt reply with updated instructions on the back strap placement.  Bonus points for awesome customer service!  Ohh Lulu is getting more business from me in the future.  

The fabric:  For the first attempt I used a cotton/lycra jersey, purchased from Girl Charlee, both as the self and lining.  This sounded like a good idea, but as I was adding the band elastic, I realize it was way too bulky.  As the name of this style implies, it crosses over in the front, so for several inches you are dealing with 4 layers of fabric.  When I turned back the elastic to the wrong side it was very bulky and my zig-zag stitched elastic doesn't lay flat.  So keep in mind, if you're going to use a lining, keep it thin.  For the second attempt, I used plain cotton jersey leftover from my Moneta dress and some dri-wicking fabric I found as a remnant at Joann.

The elastics:  Where to find lingerie elastic???  While Hancock Fabrics has started to carry lingerie elastics, they are quite expensive--$2-3 for one yard.  After my first attempt proved that my picot elastic wasn't sturdy enough for a bottom band, I did cave in and buy 3/4" brushed back elastic.  I used it for my second attempt and it is infinitely better than the picot elastic.  I will save the picot elastic for a style of bra that only uses one or two layers of fabric.  

I knew that buying elastic in bulk would be far cheaper.  I ended up finding the three different elastics I needed at Sew Sassy Fabrics.  There was the foldover elastic, picot edge band elastic and strap elastic.  The difficult part was trying to get them all to match in color.  Obviously my elastics didn't end up matching in the first attempt.  For the second attempt I just used white elastics and straps.  

My changes:  For the first attempt I didn't use an adjustable strap, just cut two lengths of strap elastic, sewed them to the back, then tried on the bra and adjusted the length to my liking and pinned to the front. But the elastic I used proved to not be sturdy enough and the cups keep sagging.  I also didn't add the hook and eye closure; the bra was big enough for me to just sew a center back seam and slip it on over my head.  

For the second attempt I followed the directions and used the adjustable straps and added the hook and eye closure.  On this one I also added some cotton batting to the lining to provide some 'coverage' if you get my drift.  I cut out circles about 3" in diameter.  Once the front cups were sewn, I tried one on to figure out the placement and used a large zig-zag stitch to sew the batting to the wrong side of the lining.  

So, here are my final conclusions:  Cute and comfortable design.  If you choose the right size and the right elastics it will fit well.  Choose your fabrics carefully so that you don't end up with too much bulk.  For the elastics, be sure the bottom band elastic is sturdy enough to handle several layers of fabric.  Here are a few more photos of my second attempt...
Picture
Inside of the bra.
Picture
Front details.
Picture
Hook and eye closure was not available in white; I sewed it on a little crooked (oops).
0 Comments

Moneta Dress

6/24/2014

0 Comments

 
Here it is, my first knit sewing project!  Pattern is Moneta by Colette Patterns.  In fact, I made this as part of the Moneta Sewalong.  
Picture
Awhile back when Sarai of Colette Patterns first announced that she was coming out with a book on sewing with knits, she put out a really awesome deal on her website for pre-ordering the book plus two knit patterns as a bundle.  The catch was that the patterns hadn't been released yet, so it was a mystery what I was buying.  Normally I wouldn't buy something without knowing what it was, but Sarai's style really speaks to me, so I doubted that I would hate anything that she designed.  I ended up receiving Moneta, the exact type of knit dress that I would wear, and Mabel, a pull-on pencil skirt, which is exactly the kind of skirt that my husband thinks I should wear (haha).

The fabric I chose for my Moneta was a medium weight light heather grey jersey.  As much as I love the feel of bamboo and rayon knits, I didn't want to deal with something slippery on my first try with knits.  I chose to do version 1, the sleeveless lined version, with the roll collar from the Moneta Extras download.  I'm not the best photographer, and I took photos with three different backgrounds, and my dress just kept getting blown out into a giant blob of bright white.  Sigh.  If only I could get my camera to cooperate.  

My measurements are all over the board (as usual), with my bust in-between a small and medium, my waist technically a large, and my hips a medium.  Always the waist that gets me in trouble.  Well, I chose to make a size medium since it would stretch and hopefully fit my waist.  The fit was pretty good, except for a substantial gap in the armhole.  I was a little irked that the pattern said to fit as you go, but then said that you couldn't try it on after sewing the side seams because you might stretch out the waist.  I guess I should have ignored that and tried it on anyway, because I didn't notice the armhole gap until the whole thing was finished.  I really didn't want to rip out overlock stitch (ugh) and undo the lining (double ugh).  So, as my mom says, just keep moving and no one will notice.  Or wear it with a cardigan.  Either way, it's not devastating.  

But how to fix the pattern for next time? I should know since I have an actual degree in design and took 6 quarters of pattern drafting classes.  But, sadly, almost all the curriculum was based on wovens and about one week was dedicated to knits.  I would know how to fix it if this was a woven, but there are no darts, and shouldn't be in a knit pattern.  I remembered at my old job the patternmaker sort of smushing out the excess in the pattern piece, so I will try that.  However, I'm not sure if I should adjust the armhole if I plan to add sleeves, since that would affect the armscye circumference.  I guess I'll just worry about that when I get to that project...
0 Comments
<<Previous
    Azalea & Rosebud Knits
    Picture

    Author

    Cassie loves to knit, read and cook.  She sometimes does all three at the same time.

    Picture
    Picture
    Picture
    Visit Azalea & Rosebud Knits's profile on Pinterest.

    Categories

    All
    Books
    Food
    Gardening
    Knitting
    Quilting
    Sewing

    Archives

    May 2017
    December 2016
    November 2016
    August 2016
    May 2016
    April 2016
    March 2016
    February 2016
    January 2016
    December 2015
    November 2015
    October 2015
    September 2015
    August 2015
    July 2015
    June 2015
    May 2015
    April 2015
    March 2015
    February 2015
    January 2015
    December 2014
    November 2014
    October 2014
    September 2014
    August 2014
    July 2014
    June 2014
    May 2014
    April 2014
    March 2014
    February 2014
    January 2014
    December 2013
    November 2013
    October 2013
    September 2013
    August 2013
    July 2013
    June 2013
    May 2013
    April 2013
    March 2013
    February 2013
    January 2013
    December 2012
    November 2012
    October 2012
    September 2012
    August 2012

    RSS Feed

Powered by Create your own unique website with customizable templates.