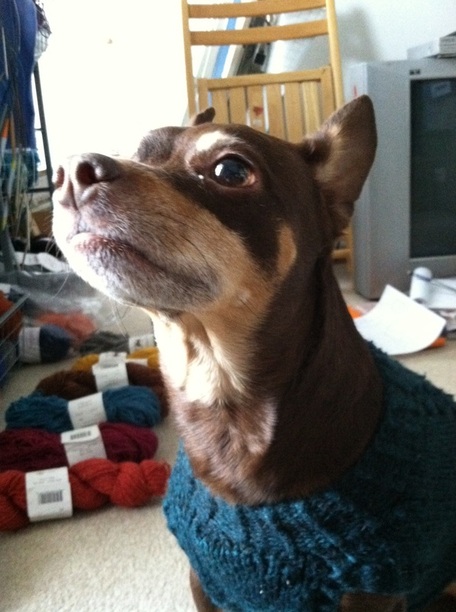
It has been pretty cold where I am, or at least I think it is cold having grown up in a desert where it was hardly ever below 50 degrees. My dog thinks it is cold too and he has been happily wearing his sweater day and night. In fact, he came wandering into my office awhile ago and hopped up onto my lap to stay warm while I typed away. Eventually he hopped down and went about his duties guarding the yarn stash while hiding underneath my chair.
|
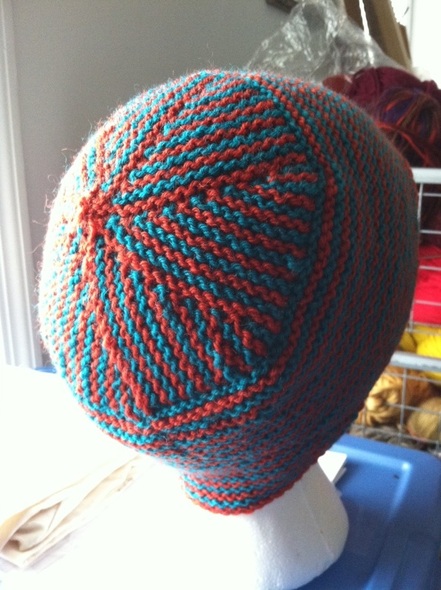
I feel like I had disappeared off the face of the earth for the past week. I've been sick with my second cold of the season and it really knocked me down. I didn't even knit for about 5 days, so that tells you how lousy I felt. But luckily I'm on the mend and sitting at my desk typing up a new pattern. It has been pretty cold where I am, or at least I think it is cold having grown up in a desert where it was hardly ever below 50 degrees. My dog thinks it is cold too and he has been happily wearing his sweater day and night. In fact, he came wandering into my office awhile ago and hopped up onto my lap to stay warm while I typed away. Eventually he hopped down and went about his duties guarding the yarn stash while hiding underneath my chair. See? Nobody is getting past this guy to get to my rainbow palette of Silky Wool. Projects have been accumulating on my desk, and a fast approaching deadline is pushing me to get things done. This hat has been sitting on my desk for awhile. Hopefully in a couple weeks I will be able to type the pattern up and start the testing process. Until next time, Happy Knitting and stay healthy!
0 Comments
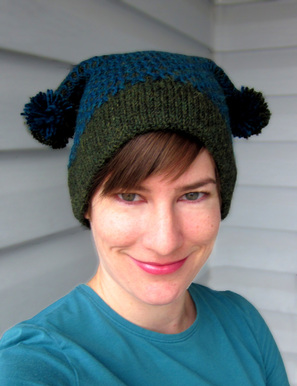
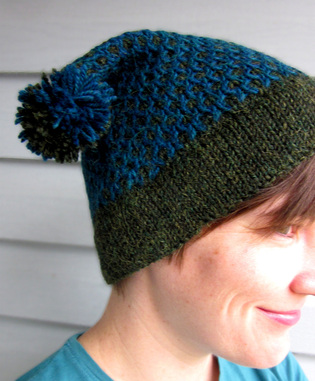
I've already written a couple blog posts featuring this hat, and I am happy to say that I have finally published it! Hard to believe I started working on this hat back in October. It started off as a funny joke to make a hat with ears that look like my dog's ears. It went from a gag to hey! I really like this design, let's publish it! I hadn't made a pom pom in years, so learning how to make one the proper way was fun.
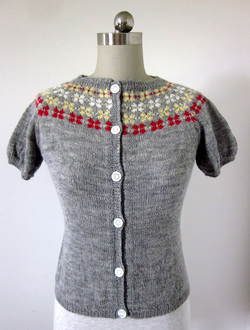
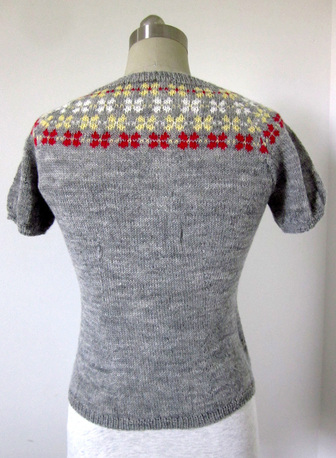
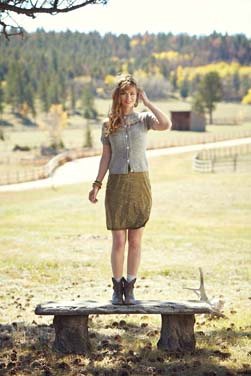
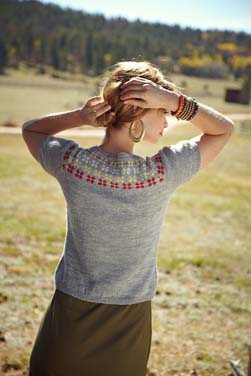
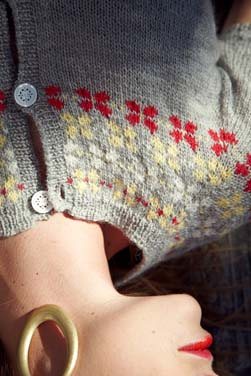
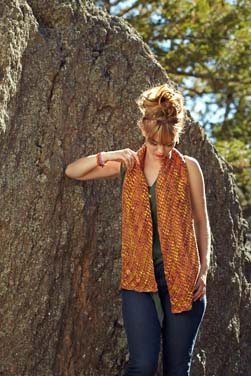
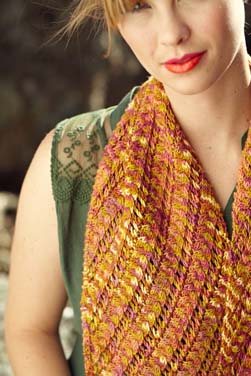
Honeycomb Hive Hat is a close fitting hat with little ‘ears’ that are decorated with pom poms. A double layer band and 2-color honeycomb stitch pattern create dense fabrics that will keep your head nice and toasty warm. The hat is worked from the bottom up in the round. With no shaping and an intuitive stitch pattern, this hat is a relatively easy knit. The top of the hat is finished with a three needle bind off. Honeycomb Hive Hat is sized to fit the whole family. When choosing your size, it is recommended to have 2” negative ease. Sample shown in adult S. SIZES baby (toddler, child, adult S, adult M, adult L) to fit head circumference 16.5 (19, 21, 22, 23, 24)” FINISHED MEASUREMENTS Body circumference: 14.5 (17, 19, 20, 21, 22)” Length: 6.5 (7.5, 8, 8.5, 8.75, 9)” SKILLS NEEDED ability to read a chart basic knowledge of cables backward loop cast on three needle bind off m1 MATERIALS Berroco Ultra Alpaca (50% alpaca, 50% wool; 215 yds/198 m per 100 g ball); Color A: 6277 Peat Mix, 1 (1, 1, 1, 1, 2) skeins; Color B: 6285 Oceanic Mix, 1 skein. Approximate yardage used: Color A: 110 (150, 180, 200, 210, 235) yds Color B: 70 (90, 110, 125, 135, 145) yds NEEDLES US #5/3.75 mm 16” circular needle US #7/4.5mm 16”circular needle and one dpn or straight needle for three needle bind off Adjust needle size to get correct gauge. NOTIONS REQUIRED Tapestry needle to weave in ends One stitch marker Cable needle or extra dpn small piece of lightweight cardboard for pom pom template GAUGE 20 sts and 30 rounds = 4” Stockinette stitch on smaller needles 28 sts and 28 rounds = 4” in 2-color Honeycomb pattern. Check gauge in both stitch patterns. Designer note: I am a loose knitter, so please check your gauge before beginning this project. It may be necessary to go up 1 or 2 needle sizes. For this pattern it is important to check your gauge in both stitch patterns and adjust both needle sizes if necessary. $5.00 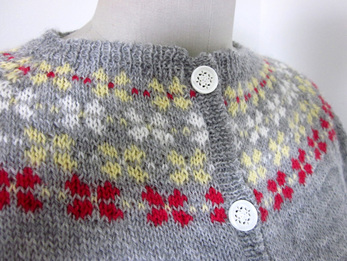 Tips for a successful Edelweiss Cardigan My Edelweiss Cardigan has just been published in the Spring 2013 issue of Knitscene, yay! I think this cardigan is my favorite sweater design to date. It is lightweight and colorful and would look great over a spring dress or jeans. This design uses some techniques that might be new to some knitters, so I wanted to write this post to encourage some practice before tackling the sweater. The gauge swatch. I know, I know. I can hear the collective groan. Gauge swatches are no fun, but it is especially important to make one for the Edelweiss Cardigan. Why? Well not only is the correct gauge critical to get the right fit, the gauge swatch also gives you a chance to practice the special techniques involved in the making of this sweater. What are those special techniques you might be wondering? Well, they are: stranded colorwork, steeking, and a sewn rib bind off. I know how you’re feeling, you’re excited to start a new project and want to do it NOW! But, please, take a couple evenings to work out all the kinks. This sweater is worked on tiny needles, so for the leisurely knitter it could be several months of work. I really want everyone working up this pattern to be SUCCESSFUL so take the time and save time, right? A stitch in time saves nine? Too corny? Ok, I’ll get on with the explanation. Stranded Colorwork. For the longest time I struggled with stranded colorwork. As beautiful as the designs were, I just couldn’t find a way to hold the yarns that was comfortable. I tried one strand in each hand, both strands over my right index finger, but both ways just made my hand cramp up after a couple minutes. Then, thanks to twitter, I found this video. http://www.youtube.com/watch?v=9Bn704khnO8 One strand on either side of the index finger. It was like magic, suddenly I whizzed through the rounds like it was nothing and a pretty two color pattern emerged. I’m not saying you have to hold your yarn this way; I’m saying experiment until you find a method that is comfortable for YOU! Another thing about stranded colorwork is that it is easy to pull the floats too tight. Check out this blog post by Eunny Jang which explains how to keep those floats nice and loose, plus there are answers to other questions you might have about working stranded colorwork. http://www.eunnyjang.com/knit/2006/11/tips_tricks_and_treats.html Steeking. Cutting into your knitting is a scary thought, and that is exactly what a steek requires you to do. This is my first design using a steek and I have to say I was a bit nervous. I found these posts by Eunny Jang that explain how to steek, and how to secure the steek, in depth and it eased my fears. http://www.eunnyjang.com/knit/2006/01/the_steeking_chronicles_part_ii.html I decided to secure the steek with lines of hand sewn backstitching. It seemed easier and more secure than the crochet method. A crochet steek might look nicer, but on such a tight gauge I thought it might be difficult for a first time steeker. If you want to try the crochet method, go for it! I would love to see how it comes out. Sewn Rib Bind off. I used a tubular cast on for the rib at the neckline and wanted a matching bind off at the bottom hem. A regular sewn bind off is nice and stretchy, but doesn’t exactly blend in with the k1, p1 rib pattern. I found instructions for a perfect bind off in The Principles of Knitting by June Hemmons Hiatt on page 90, the One Needle Grafted Edge. The instructions sound a bit complicated at first, but once you get the hang of it, this bind off has an easy rhythm to work and it makes such a nice edge that blends into the rib seamlessly. Once you master the maneuvering, just remember: knit on, knit off, purl on, purl off. Now, the actual making of the gauge swatch. I will start off by saying that I am a LOOSE knitter. Everyone has their own tension and their own style of knitting. It may be necessary to go up one or two needle sizes if you tend to knit tightly. First make a small Stockinette stitch swatch to see if you are close to getting the right gauge. Once you determine what needle size YOU need to get the right gauge, find a needle one size smaller, this will be the needle used for the ribbing. The gauge swatch needs to be worked in the round, so either use the magic loop method or use dpns. Using the smaller needle and a tubular cast on, CO 50 sts. Make sure sts aren’t twisted, pm and join in the round K5, pm, work in k1, p1 rib to last 5 sts, pm, knit to end. Cont in patt for 1”. Change to larger needle and work in Stockinette stitch for at least 2”. Now change to the stranded colorwork and work the Steek chart,sl m, work Yoke chart once (40 sts), work steek chart. Cont in patt to end of chart. If you start to notice that the work is pulling in on the stranded colorwork then an adjustment needs to be made. Measure your gauge. Is the colorwork gauge tighter (more sts per inch) than the Stockinette gauge? Try to keep the floats looser and continue working. Still too tight? Try going up a needle size. It might be necessary for the whole stranded colorwork section to be worked on a larger needle. Once you determine how to get the right gauge for the stranded colowork section, change to the smaller needle and the main color. K5, sl m, work k1, p1 rib to m, knit to end. Cont in patt for 1”. Now practice the sewn rib bind off. It takes a bit of practice to get the right tension. After you drop the stitch from the needle gently pull on the yarn until the loop shrinks to the right size and you will see it blend into the knitting. Once you have bound off all the stitches we are ready to steek. Follow the pattern instructions for reinforcing with a backstitch. It is easier to see what you are doing if you use a contrast color sewing thread, and since the steek will fold back to the inside of the sweater, no one will see it. Be sure to sew down the middle of each stitch, splitting the yarn plies. Now the dreaded part. Cutting the steek. Be sure to use a sharp pair of scissors. I happened to see that scissors were on sale at Joann’s and bought myself a pair of Fiskars Knitter scissors. They are short, sharp scissors with blunt (non-pointy) tips. Cut between the two middle steek stitches. Don’t worry, everything will be fine. Even if (gasp!) the first steek stitches unravel, you reinforced the next stitches so they aren’t going anywhere. Wool likes to stick to itself, and Nature Spun fingering is pretty darn sticky. I had to rip out a small section of the sewn bind off, so I know firsthand just how sticky it is! Now you have a nice flat gauge swatch. Wash gently and let it dry flat. Measure the gauge again just to be sure. That wasn’t so bad, was it? Now go on and make yourself a beautiful sweater! I can’t wait to see the projects on Ravelry. If you have any other questions or problems, please email me and I will do my best to help. The preview is up for Knitscene Spring 2013!! Yay! With every issue that comes out I just love this magazine more and more. The style direction is very 'me' and, in my humble opinion, Knitscene has the most wearable designs in all the knitting magazines out there. My opinion is probably very biased since I am lucky to have two designs in this issue. Photos courtesy of Knitscene. First up is Edelweiss Cardigan. A short raglan sleeve cardigan with a stranded colorwork yoke in little flowers. Worked in the round with a steek that is cut open at the end. Cutting your knitting sounds like something out of a nightmare (or maybe knitmare), but once you try it you realize it isn't that scary. A sticky wool yarn plus a few rows of hand-stitching ensure that there will not be any disasters once scissors meet your sweater. Despite the small needles, once the yoke is complete this sweater just flies off the needles with all the plain Stockinette stitch. Next up is Lilka Scarf. Take cables and lace to a whole new level by knitting them on the bias. With the addition of increases and decreases on opposite ends, this simple stitch patterns becomes tilted and looks far more complicated than it really is. This scarf is a really great project to show off hand-painted yarns.
You can buy the digital edition now, or wait for it to arrive in stores on January 22nd. Until next time, Happy Knitting! Back in November I showed up to my local knit night group and found a reporter and photographer for the local paper. We got to talk about knitting, why we knit, what we like to knit, and various other things. If you'd like to read the article you can see it here.
A few weeks later I got an email from another reporter from the same newspaper asking to do an interview with just me. I was completely shocked! I very happily said yes and arranged a date and time. I got to share my experiences of becoming a designer and how I first learned to knit and so on. Very fun and exciting to be interviewed! The article was published today, and you can read it here. Also interviewed in the article is my knit night buddy, Dr. John Hall, and Pam Kelly, a local yarn store owner. |
AuthorCassie loves to knit, read and cook. She sometimes does all three at the same time. Categories
All
Archives
May 2017
|





 RSS Feed
