
Frequently I get emails from knitters asking me what size to choose on my patterns. This is a really tough question to answer through email with very little information. I try to answer the best I can, but without knowing all your measurements and the way your body is shaped, my answer might not be worth much. Here are some things to keep in mind when choosing a size:
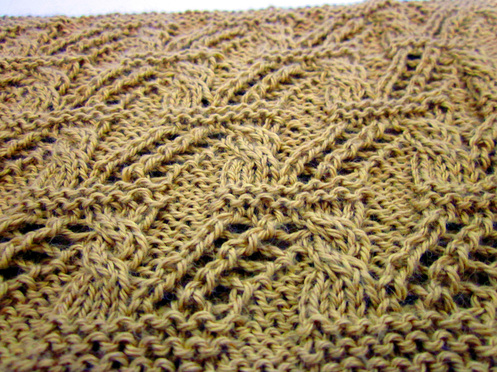
Don’t choose a size solely on the finished bust circumference. So many times, over and over, I have seen people do this and it frequently leads to disappointment. Bust circumference might be one of the easier measurements to take, but it is not the most relevant. The most relevant measurement (in my humble opinion) is the shoulder to shoulder width. More on that topic later on in the post.
Take a look at a pattern. Somewhere near the end you’ll see a schematic. The schematic is not just a reference for blocking. Make the schematic your best friend, it is the best tool for picking the correct size.
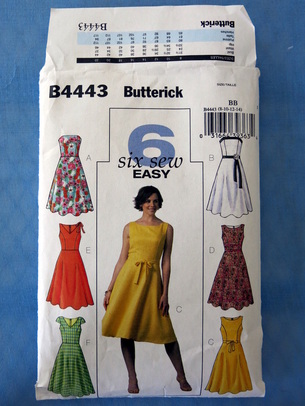
Once you have made an informed decision on a size, don’t assume that all the measurements in that size will fit you. Designers use a ‘standard measurements’ chart to determine the sizing in all the various parts of a sweater, and very few people actually fit perfectly into one standard size. Anyone who has made clothes from home sewing patterns will tell you (myself included) that they don’t fit into a single size—my bust, waist and hip measurements fall into three different sizes. Take a look at the sizing charts on the Craft Yarn Council website. Pick the size you think you are, then compare them to your actual measurements. How well did they match up? Here is a brief example with my measurements vs the standard measurements.
Don’t choose a size solely on the finished bust circumference. So many times, over and over, I have seen people do this and it frequently leads to disappointment. Bust circumference might be one of the easier measurements to take, but it is not the most relevant. The most relevant measurement (in my humble opinion) is the shoulder to shoulder width. More on that topic later on in the post.
Take a look at a pattern. Somewhere near the end you’ll see a schematic. The schematic is not just a reference for blocking. Make the schematic your best friend, it is the best tool for picking the correct size.
Once you have made an informed decision on a size, don’t assume that all the measurements in that size will fit you. Designers use a ‘standard measurements’ chart to determine the sizing in all the various parts of a sweater, and very few people actually fit perfectly into one standard size. Anyone who has made clothes from home sewing patterns will tell you (myself included) that they don’t fit into a single size—my bust, waist and hip measurements fall into three different sizes. Take a look at the sizing charts on the Craft Yarn Council website. Pick the size you think you are, then compare them to your actual measurements. How well did they match up? Here is a brief example with my measurements vs the standard measurements.
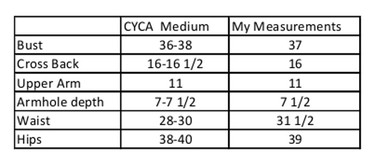
Don’t be afraid to do some math to create the best fit for you. Whenever I utter the words ‘math’ or ‘calculate’ to a knitter, they seem to shudder with fear. Adjusting a pattern is usually not difficult, and is nothing to be afraid of. You want a sweater that fits well, don’t you? It is much better to spend an hour or two doing some simple math then spend months on a sweater that doesn’t fit. As you can see from my example above, my waist is about 1 1/2" larger than the standard size. While knitted fabric stretches and I wouldn't have to worry about a sweater fitting over my middle, depending on the design I might want to add a few more stitches in the waist.
Do keep in mind the recommended amount of ease in the pattern. Ease is one of those subjects that seems to really confuse knitters. Negative ease means the circumference of the sweater will be smaller than your body circumference and will be very fitted. Positive ease means the circumference of the sweater will be larger than your body circumference and will be a looser fit.
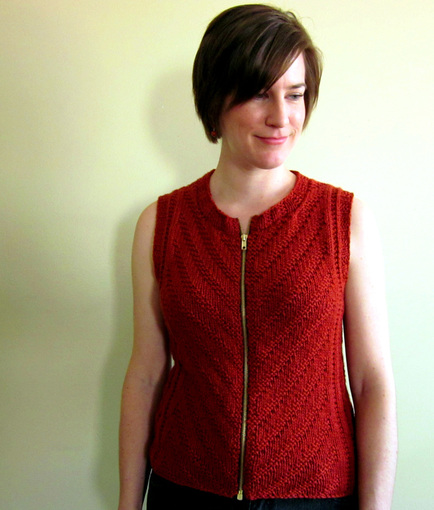
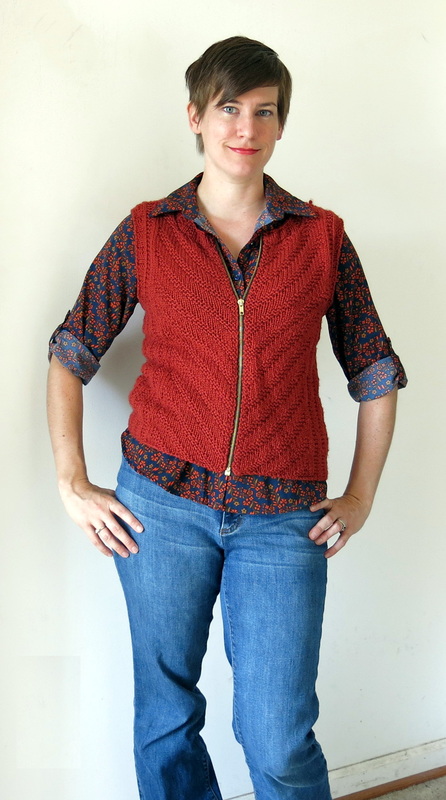
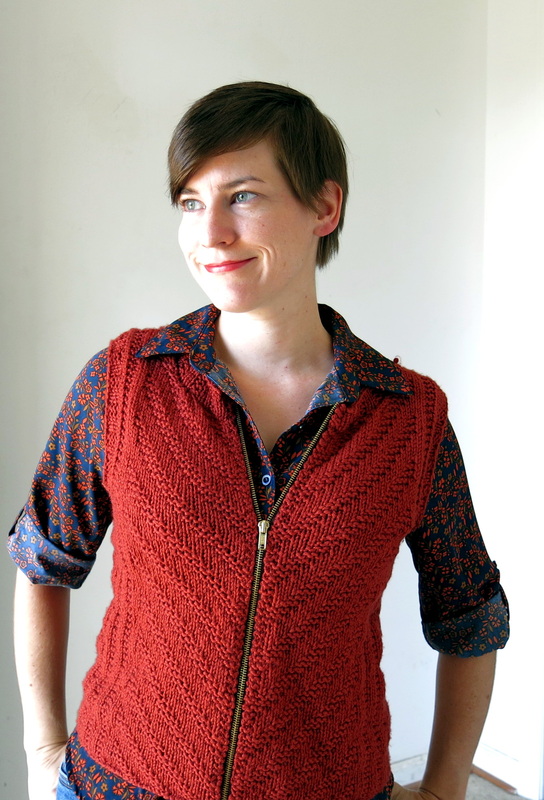
I designed my Sunburst Tee to have a couple inches of positive ease in the bust. Without my knowledge, one of my test knitters chose a size with several inches of negative ease because she liked tighter fitting sweaters, and then complained to me that the armhole was too short and tight. Well… yeah. Of course it is too tight, you chose a size designed for someone with a bust about 6” smaller than yours. If you are going to stray that far from the recommended ease because you want something tighter or looser, double check the lengthwise measurements, such as armhole length, body length, and neck depth. You don’t want to be swimming in your beautiful sweater or feel like a stuffed sausage.
Back to the schematic and choosing a size. Why is the shoulder to shoulder width so important? For set-in sleeves, the proper fit in the shoulder will make or break a sweater. If it is too narrow, the top of the sleeve cap will pull in, feel tight and uncomfortable, and look awkward. Your sweater will continually ride up in an annoying way and you will probably be constantly pulling down on it. If the shoulder width is too wide, the shoulder seam will drop down onto the arms and the excess fabric in the sleeve cap will droop.
Another reason that the shoulder width is important, any time you start changing the shoulder width, it affects the armhole circumference as well. And when you change the armhole circumference, you have to adjust the sleeve cap too. Let me tell you, friends, sleeve cap math can be confusing. Make things easier for yourself and pick a size where you don’t have to change the shoulder width. To measure your shoulder width, measure from shoulder bone to shoulder bone. Wearing a well-fitting tee shirt with armhole seams that go straight up from your armpit while measuring might make things easier.
Do keep in mind the recommended amount of ease in the pattern. Ease is one of those subjects that seems to really confuse knitters. Negative ease means the circumference of the sweater will be smaller than your body circumference and will be very fitted. Positive ease means the circumference of the sweater will be larger than your body circumference and will be a looser fit.
I designed my Sunburst Tee to have a couple inches of positive ease in the bust. Without my knowledge, one of my test knitters chose a size with several inches of negative ease because she liked tighter fitting sweaters, and then complained to me that the armhole was too short and tight. Well… yeah. Of course it is too tight, you chose a size designed for someone with a bust about 6” smaller than yours. If you are going to stray that far from the recommended ease because you want something tighter or looser, double check the lengthwise measurements, such as armhole length, body length, and neck depth. You don’t want to be swimming in your beautiful sweater or feel like a stuffed sausage.
Back to the schematic and choosing a size. Why is the shoulder to shoulder width so important? For set-in sleeves, the proper fit in the shoulder will make or break a sweater. If it is too narrow, the top of the sleeve cap will pull in, feel tight and uncomfortable, and look awkward. Your sweater will continually ride up in an annoying way and you will probably be constantly pulling down on it. If the shoulder width is too wide, the shoulder seam will drop down onto the arms and the excess fabric in the sleeve cap will droop.
Another reason that the shoulder width is important, any time you start changing the shoulder width, it affects the armhole circumference as well. And when you change the armhole circumference, you have to adjust the sleeve cap too. Let me tell you, friends, sleeve cap math can be confusing. Make things easier for yourself and pick a size where you don’t have to change the shoulder width. To measure your shoulder width, measure from shoulder bone to shoulder bone. Wearing a well-fitting tee shirt with armhole seams that go straight up from your armpit while measuring might make things easier.
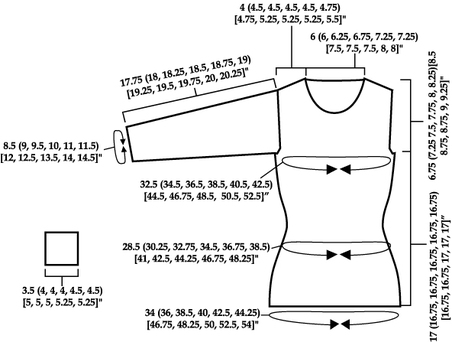
When you are looking at your schematic, if you don't see the complete shoulder to shoulder measurement, you might have to add both shoulder widths plus the neckline. Take a look at the schematic above. The shoulder to shoulder measurement for the smallest size would be: 4 + 4 + 6= 14".
Look at the schematic in your pattern and choose the shoulder to shoulder width closest to yours. Now, compare the rest of the measurements. Widthwise: Bust, waist, hip, and bicep circumference. Lengthwise: body length, armhole length, neck depth. How do they compare with your actual body measurements? Be sure to take into account the recommended ease.
If you need to make adjustments, your methods will vary from pattern to pattern. It might mean adding or subtracting stitches at the cast on, making fewer waist decreases, or shortening the length of the body up to the armhole. Methods of shaping, stitch patterns, and design elements all come into play, so it isn’t something I can make a general statement about. Looking at finished projects on Ravelry is a great resource for seeing how other people have modified a pattern to fit themselves.
If you need to add or subtract inches, you will need to convert the inches into stitches. Here is where your gauge comes into action. You did knit a gauge swatch, correct? Use the gauge from your swatch, and not the pattern. It is difficult to replicate the pattern gauge in both stitches and rows exactly, so work off your gauge.
Example: say you have chosen your size based on the shoulder measurement, but your hips are a bit wider than the pattern size, and you need to add 2” in circumference. Let’s say your gauge is 20 sts= 4”. Divide 20 by 4 to get the stitches per inch, which in this case is 5. We need to add 2”, so 2 x 5= 10 sts. But, it is 10 sts overall, and you will need to add half to the front and half to the back. 10/2= 5 sts to add for the front, and 5 sts for the back. Hmm…odd numbers aren’t really friendly to symmetry. You might need to adjust to an even number on each side, so either 8 or 12 sts overall.
What about other types of sweaters that are not set-in sleeves, such as raglans or round yokes? Good question, since there isn’t a definite shoulder width on those types of sweaters. Still compare your measurements with the measurements on the schematic and see which size will work best for you. In general, it is good to know how your body shape is different from the standard measurements so you will know proactively where to make adjustments. It takes time and experience to learn how to best fit your body, but it is worth the extra effort.
Still have more questions about choosing a size? Please leave comments below, and I’ll be happy to answer them.


 RSS Feed
