Azalea and Rosebud Knits
  • Blog
  • Patterns
    • Hats >
      • Roelle Hat
      • Winterset Hat
      • Design Your Own Hat
      • Valentine Cables Hat
      • Kilbourne Hat
      • Etoile Hat
      • Glenrowan Hat
      • Button box cloche
      • Adora Hat
      • Aster Hat
      • Argyle Cabled Beret
      • Zoey Star Beret
      • Cairo Hat
      • Honeycomb Hive Hat
      • Lakkos Cloche
    • Pullovers & Cardigans >
      • Noemy Pullover
      • Yvaine Cardigan
      • Daiva Cardigan
      • Trail Henley
      • Salisa Cardigan
      • Thara Cardigan
      • Dealla Cardigan
      • Shiloh Sweater
      • Katrina Pullover
      • Liana Cardigan
      • Jocasta Pullover
      • Edythe Pullover
      • Ripple Edge Cardigan
      • Kaleidoscope Pullover
      • Sunsine & Rain Henley
      • Begonia Pullover
      • Climbing Rose Henley
      • Irisa Cardigan
      • Makalu
      • Sinai
      • Sand Dollar Cardigan
      • Nopales
      • Lava Rock Cardigan
      • Sharee Cardigan
      • Annalise Pullover
      • Starbrook Pullover
      • Rosemary Cardigan
      • Alison Pullover
      • Edelweiss Cardigan
      • Minnette Pullover
      • Erte Cardigan
      • Nocturnal Pullover
      • Morrison Cardigan
      • Wessex Cardigan
      • Valhalla
      • Leftovers for dinner
    • Tees & Tanks >
      • Cowesett Tee
      • Janesse Pullover
      • Kayleen Pullover
      • Tiye
      • Dahshur
      • Rhodora
      • Jacaranda Tunic
      • Sakura Tee
      • Sunburst Tee
      • Lindell Tee
      • Adeline Camisole
    • Vests & Shrugs >
      • Elephant Vest
      • Elephant Safari Children's Vest
      • Rimrock Vest
      • Bartram Vest
      • Karnak Vest
      • Dark Lotus Shrug
      • Lancero Vest
      • Aster Vest
      • Olexa Vest
      • Morocco Vest
      • Loretto Vest
      • Camellia Shrug
    • Shawls >
      • Nadina Shawl
      • Janelle Shawlette
      • Nile Valley Shawl
      • Ciara Shawl
      • Emmylou Shawl
      • Graciella Shawl
      • Djoser shawl
      • Desert Waves Scarf and Shawl
      • Blackberry Mist Shawl
      • Mariposa Shawl
      • Technidream Shawl
      • Log Cabin Shawl
      • Rosana Shawl
      • Siren Shawl
    • Scarves & Cowls >
      • Zohra Cowl
      • Esna Cowl
      • Avery
      • Lavienne Scarf
      • Joselyn Cowl
      • Jayda Cowl
      • Raissa Cowl
      • Rosewood Cowl
      • Lilka Scarf
      • Hoptree Scarf
    • Gloves >
      • Roelle Gloves
      • June Mitts
      • Cranberry Mitts
      • Cabled Heart Fingerless Gloves
    • Skirts >
      • Lucine Skirt
    • Jewelry & Other Accessories >
      • Inez Necklace
      • Bettina Headwrap
      • Saqqara Necklace
      • Endira Necklace
      • Lapis Cuff
      • Athena Headband
    • Stash-busting
  • Tutorials
    • Entrelac Tutorial
    • Double Knitting tutorial
    • Honeycomb Cables without a cable needle
    • Twisted stitches tutorial: k1tbl & p1tbl
  • eBooks
  • About
  • Contact

Sharee Cardigan: the peplum decrease row

5/30/2014

1 Comment

 
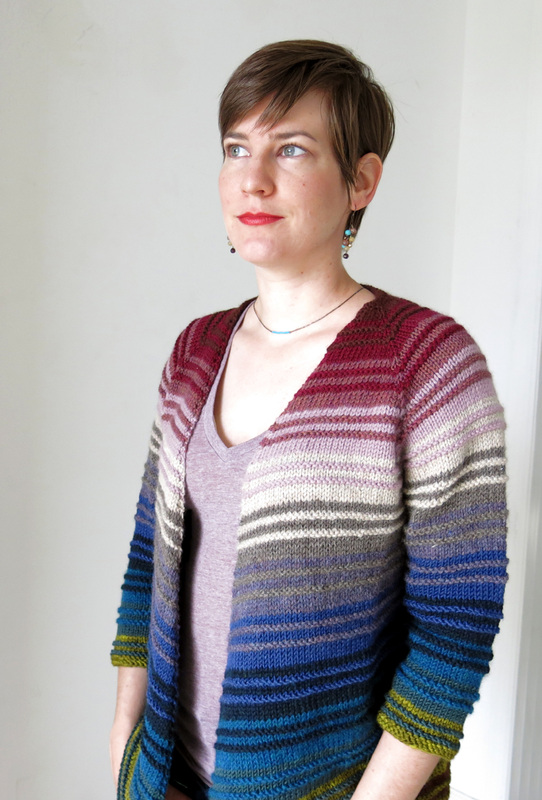
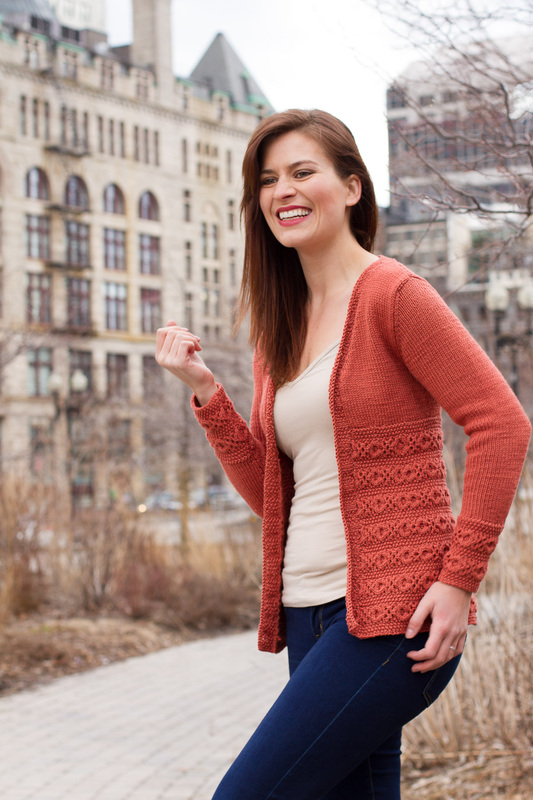
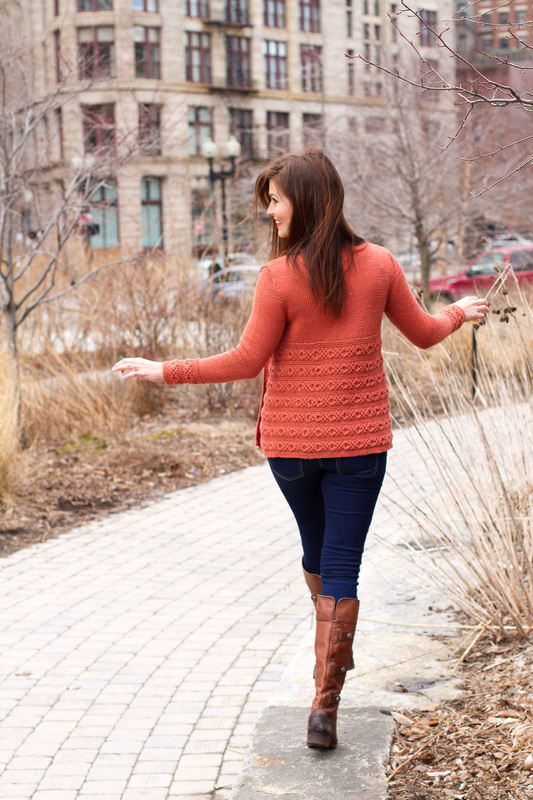
I've received a few emails from knitters that are a bit confused by the peplum decrease row on the Sharee Cardigan, so I thought I'd clarify a few things.  First of all, yes it is correct.  I think what is tripping people up is that there are so many numbers in that row that it is difficult to read, and I apologize for that.  I wasn't sitting at my computer maniacally laughing while purposely creating a difficult to read pattern.  I try find a balance between ease of reading the pattern and what will create the best looking sweater.  Sometimes it is difficult to find that balance, and if I have to choose one I'll go with what makes the best looking result.

So, what to keep in mind here:  there are 3 different decrease rates so that the decreases will be worked evenly across the row, using up all the stitches.  To make it easier for yourself I will suggest photocopying this page of the pattern and highlighting the three decrease rates with three different highlighters or underline with 3 color pens, whatever works for you.  For each decrease rate you will need to circle two numbers: how many knit sts, then how many times you will repeat this action.  So it will be kx, k2tog x times.  Then you can re-write the row on your photocopied page. 

Here is an example, using the numbers for size 35".  We begin with 207 sts.  If I circle my numbers and re-write the decrease row, it will look like this:
k2, k2tog 3 times; k3, k2tog 36 times; k2, k2tog 3 times, end k1, k2tog.  43 sts decreased, 164 sts remain.

Let's check the math:  
k2, k2tog 3 times= 4*3= 12 sts used, 3 sts decreased.
k3, k2tog 36 times= 5*36= 180 sts used, 36 sts decreased.
k2, k2tog 3 times= 4*3= 12 sts used, 3 sts decreased.
end k1, k2tog= 3 sts used, 1 st decreased.
12+180+12+3= 207 sts used, which is what we began with.
3+36+3+1= 43 sts decreased.  Voila!  It all adds up.

Now, if you want to know why I had to do it this way, keep reading.  If not, happy knitting and I hope this has made it a bit easier for you.

Why so many numbers?  Couldn't I have done this with a simpler decrease rate?  I could have, but the result might not have been as pleasing.  I wanted the decreases to be worked as evenly across the row as possible, and every size had a different amount of stitches being decreased.  

As I was designing I realized that for the peplum, I couldn't just add a certain number of inches to the waist measurement.  Adding 7" to a 30" waist wouldn't look the same as adding 7" to a 45" waist.  The size with a 30" waist would have much more fullness than the 45" size.  To get a consistent amount of fullness in each size, I needed to add a certain percentage. for each size  In addition to that, I had to take into account how many stitches are in each repeat of the lace.  The percentage rate, in case you are curious, was based on 116% of the full hip measurement, and then I adjusted from there.  The end result was lots of numbers, and since I wanted a lovely peplum I went with the complicated numbers.  

So I hope this helps, and if you still find yourself with questions please don't hesitate to email me.  You can use the email address supplied on the pattern, or you can use the contact form on my website.  Happy Knitting!  
1 Comment

The grain of salt with designing

5/30/2014

0 Comments

 
I love designing knitting patterns, and I love seeing the projects people make from them.  But like any job, there are a few downsides.  People can be critical and make harsh comments, and as much as I try to have a thick skin sometimes it hurts.  Occasionally I see projects on Ravelry made from my patterns, and I can see in the notes that the knitter was not happy with how it turned out.  Sometimes it has to do with the fit, other times it has to do with the yarn choice.  When I see these, I wish I could help, but I think it would be rather obtrusive for me to send a message with advice.  Lately, it seems like much of the unhappiness has to do with size and yarn choice.

Size
Since we are in the age of the internet, anyone who makes one of my patterns can easily contact me, and lately I have received lots of emails about which size in a pattern to choose.  Now, I try my best to help, but since I don't know you, how you like to wear your clothes, or what your body type is, all I can do is help you choose a size based on the information you give me.  Sometimes my advice is appreciated, and sometimes it's not.  But simply telling me your bust and waist measurements isn't really going to cut it.  I would like to encourage all knitters to know their body types, how tight or loose they like to wear their clothes, and know their own measurements.  The schematic in a pattern is not simply for blocking; it should be used to help you choose the best size for yourself.  Choosing a size by the bust measurement only is not the best method.  It is the easiest, but in no way doesn't it guarantee a good fit.  

Interweave Knits and Knitscene usually try to help by noting which size the model is wearing and with how much ease.  But really, the most important measurement for choosing a size is the shoulder width.  Why?  Because to look right, a set-in sleeve shoulder seam needs to rest on your shoulder bone to look good.  The bust, waist and hip measurements can be altered much more easily than the shoulder width- because, when you change the shoulders you have to start changing the sleeve cap math and that gets really complicated very quickly.

So once you measure your shoulder width and determine the best size, don't just stop there and start knitting.  Check the other measurements as well to see if you need to make any adjustments.  Designers work off a chart of 'standard measurements' but not everyone fits into those standards, and you will do yourself a favor if you know how your body differs from those standards.  Check the armhole length: is it too long or too short?  Check the body length as well, you might like your sweaters to be longer or shorter than the pattern.  Check the bust, waist and hip circumferences too.  Yes, you might need to do some math to make alterations.  No, it isn't fun.  Do you want a sweater that fits well?  Yes?  Then the math is necessary.  The book 'Knit To Flatter' by Amy Herzog is a really good tool that explains fit, different body types, and how to modify patterns to fit your shape, and I encourage all knitters to read it.

Yarn Choice
When designers create a pattern in a certain type of yarn, they take the properties of that yarn into account in the pattern.  If a pattern was designed with a wool yarn, using a cotton yarn may not be the best idea because wool and cotton have very different properties.  Wool is (usually) very elastic and bouncy.  Cotton is inelastic, can stretch out easily, and can get very heavy.  When I work with cotton yarns, I try to use seams to add stability, otherwise the sweater would get all stretched out as it is being worn.  A couple days ago I saw a project note that said the knitter was going to modify the pattern to get rid of the shoulder seams because she didn't like seaming, and I wanted to yell "No! No!  You need those!!!"  The weight of the sweater hangs off the shoulder seams, and you need those seams to provide stability to keep the whole thing from drooping.  Then today I saw someone is making a sweater out of pure silk yarn.  AAAHHHH!!!! Silk stretches out like the Dickens and doesn't bounce back!!!  Please, research your fiber choice.  Another good book is "The Knitters Book of Yarn" by Clara Parkes, and it explains all the different properties of various fibers.  If you don't want to do that, at least when choosing a yarn stick with the same type of fiber as the original design.

Also related to yarn choice is the yarn weight.  Every once in awhile I get an email saying "Hey I love your x pattern, but it uses worsted weight and I want to use up this DK weight in my stash so can you re-write the pattern for me?"  Ummm.. no.  That would involve a couple hours of math and a spreadsheet, and while I'm thrilled that you want to make my pattern, I'm not going to do all that math for free.  Then, inevitably, after I make my polite reply I get one of two questions in return.  Either "Can't I just use bigger/smaller needles to get the same gauge?" or "Can't I just knit a bigger/smaller size to accommodate?"  Using bigger or smaller needles could give you holey fabric or something that could be a substitute for Kevlar, and I wouldn't recommend it.  Knitting a bigger or smaller size might negatively affect the length, and a sweater with armholes that cuts off the circulation of blood in your arms simply won't be worn.  I try to carefully word my reply that, while either of those might work I can't guarantee the results and you might not be happy with how it turns out.  There isn't really an easy way around it, so unless you want to figure out the new gauge and calculate all new measurements based off the schematic, you will probably want to stick with the same weight yarn that the pattern calls for.

What this all boils down to is knitting education and fear.  I think some knitters just want to blindly follow the pattern without learning anything.  Years ago a knitter was showing me a hat she made, and it looked a bit... funny.  She said there was some stitch in the pattern that she didn't know how to do, so she just skipped it!  Uhhh... yeah, that's not really a solution.  So I know it might sound like 'work', but try to expand your knitting knowledge.  Learn new techniques, try to make a better fit on a sweater, and if it doesn't turn out right you can rip back and start again.  Don't feel like a failure if you have to rip back.  For every project I make, I have to rip back at least once.  It's a drag, but you know what?  When I rework it, I'm happy with the new changes every time.
0 Comments

Choosing patterns: 4 criteria

5/30/2014

0 Comments

 
Hello, friends!  While my knitting projects have been coming along swiftly, I have a big pile of sewing projects waiting for me.  I spent about four hours one day last week cutting out several projects and rolling them up with their notions to get all the prep work done.  I'm hoping that today I can finally sit down at my machine and sew!  I've bought a few more patterns and had a few realizations about how I choose my sewing patterns and thought I'd share them with you.  These apply equally to knitting as well as sewing, so read along even if you don't sew.

Over the last year or so I've become a big fan of Colette patterns, and have bought and made several.  So of course I follow them on Facebook, and this month Sarai has been participating in the 'me made may' and has been posting a photo everyday of her vintage and handmade clothes.  Along with seeing what great style she has, I realized that the clothes she makes are pretty simple, classic styles.  When I knit I try to make classic styles because with all that effort I want something that I can wear for years.  Why not do the same with sewing?  I thought about it more and more, and while I realized this awhile back with my knitting patterns, I never applied it to the sewing patterns I choose.  There are four 'criteria' that affect what I sew: 
  1. what I like
  2. what I actually wear 
  3. what degree of difficulty in a pattern I'm actually willing to sew 
  4. what styles actually look good on me.

What I like:  Up until now, this has been the only criteria I actually used to pick out a sewing pattern.  What I like are vintage-inspired dresses with full skirts and interesting bodice details.  I have made a couple lovely dresses, and for the most part they just sit in my closet and only come out on special occasions.  This criteria also applies well to the type of fabric (or yarn, if you are a knitter), and the colors that you choose.  I like the look of crepe, chiffon, and other drapey fabrics, but they are difficult to work with and I would just procrastinate making something with a slippery fabric.  Also I like really bright colors, and while I do usually wear them, I realize I also need to make some essential pieces (mostly bottoms) in neutral colors.
Picture
Beautiful dresses I love but wouldn't wear much.
What I actually wear:  So I just wrote that I love vintage-inspired dresses.  I gave myself a reality check and looked objectively in my closet.  What is it filled with?  What do I actually wear every single day?  T-shirts, trouser-style pants and shorts, skirts with elastic waists, and knit dresses.  Do I have sewing patterns in any of these categories?  Very few.  Shocking, right?  You'd think that what I like and what I wear would be the same thing.  And probably for some of you it is, so good for you!  If I still had an office job, yes I would probably get a lot more usage out of my vintage dresses.  But I work from home, and most of the time I'm covered in bits of yarn, flour, or garden soil.  Not very practical for a lovely dress.
Picture
Clothes I would actually wear.
What degree of difficulty I'm willing to sew:  I'm an impatient sewist, and right from the beginning of the project I want to be done already so I can wear it!  I'm definitely a 'product' crafter, versus a 'project' crafter.  That said, no matter how much I like a pattern, if I see it has over a dozen pattern pieces, or a ton of topstitching, or some other laborious detail I probably won't make it.  I am able to sew difficult projects, I just choose to keep them easy because I want my sewing to be relaxing.  (Doesn't always work out this way though, like on my last project when I serged a hole into my Laurel dress.  Oops.)  So take a look at the difficulty rating on your pattern.  When my mom used to make my clothes, I always wondered why she groaned when the difficult level said 'advanced'.  Now I know!  Lots of little pieces, difficult curved seams, etc.  

What actually looks good on me:  This is not about body-bashing, or complaining about my lack of something or excess of something else.  Every body-shape has styles that are more flattering than others, and it is to your benefit to figure out what your most flattering styles are.  

I bought a book not too long ago called 'Skirt-A-Day' and gives instructions how to draft your own skirt patterns.  There are many skirts that I love, many with interesting waist details and they are modeled with fitted t-shirts that the models have tucked in.  They look great, so I thought I'd try that with some skirts I already have, and I was not pleased with what I saw in the mirror.  I am fit, but I have a relatively large waist for my size (I guess that is referred to as 'boyish'?) and having the emphasis of the outfit land on my waist was not flattering at all.  So as much as I love that look, when I wear a knit top and skirt combo, to look good I know that the hem of the top needs to land well below my natural waistline.  

Opposite of that, whenever you look in the mirror and think 'Hey I look great in this!' try to dissect your outfit to see what makes it great and make a mental note for future clothes. Every time I wear a top or dress with spaghetti straps my husband heaps on the compliments.  Then one day he just blurted out 'You have really nice shoulders!  You should show them off more!!'  I hadn't really thought about that, but I suppose that is one of my 'assets', so shoulders and wide necklines are a detail I focus on.
Picture
Hmm... not so flattering.
Picture
Ahh, much better. Thank you, shoulders.
So the next time I go pattern shopping, I will try to be more mindful of my choices and buy patterns I will actually use.  Do you struggle with this too?  I'd like to hear other people's experience about what patterns they buy, versus what they actually wear.
0 Comments

Irisa Cardigan

5/20/2014

0 Comments

 
It's time for another new pattern!  Say hello to Irisa Cardigan!
Picture
Picture
Picture
Picture
I love my stashbuster patterns that use up leftover bits of yarn.  This pattern came about as a vain attempt to reduce my ridiculously large yarn stash.  I have worsted weight yarns in just about every color of the rainbow, and most of them are wool or wool blends.  I laid them all out on the floor arranged in a big rainbow and selected 13 colors to make this cardigan.  My stashbusting goal was pretty successful; I used up about 900 yards.  

Irisa is a simple raglan-sleeved, open-front cardigan worked in a textured stripe pattern. Knitted from the top down, the fit and length of Irisa are easy to customize. The textured stripe is worked in a gradient of colors, perfect for using up leftover balls of worsted weight wool or wool blend yarn from other projects. Pattern includes a large range of sizes, stripe pattern variations, and a formula for estimating the yardage remaining in a ball of yarn (which requires a food or postage scale). Cardigan meant to be worn with 2-4” positive ease in the bust. Shown with 3.5” positive ease.

Here are the pattern particulars:

FINISHED MEASUREMENTS
Chest: 35.5 (38.25, 39.5, 41.25, 43.5, 46.25)[48.5, 49.75, 52, 54.75, 57]”
Body Length: 21.5 (21.5, 22, 22, 22.5, 22.5)[23, 23, 23.5, 23.5, 24]”

MATERIALS 
Worsted weight yarn in 13 (13, 13, 13, 14, 14)14, 14, 14, 14, 14 different colors. See chart on pattern for yardage needed per color. 
845 (901, 995, 1032, 1133, 1187)1317, 1353, 1463, 1522, 1676 yards total

NEEDLES 
US #7/4.5 mm 24” and 36” circular needles and set of dpns

GAUGE
18 sts and 28 rows = 4” in Stripe Pattern

NOTIONS REQUIRED 
waste yarn 
tapestry needle to weave in ends 
stitch marker 
postage or food scale to weigh yarn in grams

SKILLS REQUIRED 
working in the round 
kfb 
k2tog 
ssk


$6.00
0 Comments

Laurels and Iris

5/12/2014

0 Comments

 
My sewing machine has been abuzz lately with lots of projects.  Now that it is darn hot, I'm really wanting to make myself summery clothes.  I have a bad habit of buying big-box sewing patterns whenever they are on sale at Joann and then never making anything from them.  The last time I went pattern shopping I realized with some exasperation that all I want are simple designs that fit well.  Apparently that is too much to ask!  At the time, I was looking for plain pants with an elastic waistband (which I will attempt to make in a non-old-lady look), a plain knit tee, and a plain woven pullover top with no buttons or zippers.  Eventually I found patterns that would work, but I realized that I really needed to look beyond Simplicity, Butterick and McCall.  

I am an independent designer, so why not support another independent designer?  I already knew that I loved the Iris pattern by Colette, so I bought a few more Colette patterns. More expensive than the big-box designs, but I knew in the end I would be much happier with a well fitted and well designed garment.  Coincidentally, Colette just published a book on sewing with knits and two knit patterns.  I took advantage of a deal and bought all three, without even knowing what the two knit patterns were.  Luckily I was not disappointed!  Along with the knit patterns I purchased Laurel, a simple shift dress.  During the hottest part of summer I live in dresses, and this looked so comfortable and cute, I knew I had to make myself at least half a dozen!

I mentioned previously that I wanted to make myself another pair of Iris shorts.  So while I was waiting for my new patterns to arrive in the mail, I dove in.  I still had my notes from my previous pair of Iris shorts.  I added a bit more curve to the center front seam, added 1/4" at the waist and hips, and added 2" in length.  Thanks to my degree in fashion design, altering the pattern just brought back (somewhat) fond memories of drafting patterns in school.  

The fabric is a red stretch sateen.  This time I watched a couple videos on sewing an invisible zipper, and even though I had to rip out my first try, the second attempt turned out swell.  I might have lost my fear of sewing zippers!  The fit turned out much better this time as well, and I did end up keeping the pockets.  They have hardly left my body since I finished them, so please excuse all the wrinkles in the picture.
Picture
After the shorts I tackled the Laurel dress.  I know that serious sewists would probably call me a blasphemer for even thinking of making clothes out of quilting cottons, but the prints are so perfect I couldn't help myself.  I at least used two *nice* quilting cottons.  The first one I shortened the sleeves a bit and did a slightly narrower hem at the bottom.  This is about as short as I like to get on a dress, so I think for my third Laurel I might add an inch or so in length.  I made my own seam binding out of a solid blue quilting cotton.  I made the ultimate serger mistake and accidentally cut a hole in my dress.  Luckily it was on the back near the bottom, and the print is so crazy that my patch job isn't noticeable.
Picture
Picture
I considered this dress my 'muslin' and realized that the only problem was that it was too tight across the shoulders.  Ever since I started working out and building up arm and chest muscle, all my tops have been too tight in the shoulders.  So again I adjusted the pattern.  I also made an alternate version of Laurel to be sleeveless and have a slightly lower neckline.  I used another quilting cotton in a really graphic yellow and grey print.  I think I look like some sort of vision test, but bold prints are the norm for me. This one doesn't hang as well as the paisley dress, so I will have to blame it on my choice to use quilting fabric.  I used single fold bias tape to finish the neck and armholes, and I think that was the best choice since this print is so busy.
Picture
Picture
I have some nice rayon challis prints and a red solid in my fabric stash, so I think I will make a third Laurel with another neckline and sleeve variation. 

But before I do that, I am determined to tackle a knit.  I'll admit that I haven't sewn with knits before, and I'm a bit intimidated.  I have the Moneta pattern and some heather grey jersey sitting on my desk waiting for me.  Sometime this week I'll re-read my sewing with knits book and gather up my courage.
0 Comments

Sinai

5/8/2014

0 Comments

 
Today I'm introducing Sinai, an open front cabled cardigan from the Louet North America Fall 2014 collection.
Picture
Picture
Picture
Designing Sinai was a big challenge for me.  I had a vision in my mind of a horizontal cabled body worked side to side, but I wanted the bottom to flare out into a slight A-line shape.  How could I create a trapezoid shape?  The answer: sections of short rows.  Sounds simple enough, but I wanted to add in short row sections that wouldn't disrupt the cable pattern too much.  So lots of careful planning and charting ensued.  And lots of erasing and grumbling.  But after all the hard work, I am quite thrilled with the end result.  I think you have to really look hard at the cables to see the short row insertions.  

After the cabled lower body is completed, it is mostly smooth sailing from there; the major portions of the upper body and sleeves are plain old Stockinette stitch.  The cuffs are worked side to side with stitches picked up along one edge for the rest of the sleeve, which is worked flat.  

Now for the pattern particulars:

Sample shown in size 34” on a 36” bust with 2” gap at front. Stitch pattern is charted only.

Bust circumference: 34 (381/4, 421/4, 461/2, 501/2, 541/2, 583/4)” 
Length: 25 (251/2, 26, 261/2, 27, 271/2, 28)”

Yarn Requirements
Louet Gems Worsted (worsted weight) 100% merino wool 175 yds per 100gr (3.53 oz) Skein
Shown in Terra Cotta #47 7 (8, 9, 10, 11, 13, 14) Skeins.

Needles
US 6 [4 mm] needles – a 36” circular needle is recommended for weight and management of project.

Notions
Stitch markers
Stitch holders or waste yarn
Tapestry needle
Cable needle

Gauge
26 Sts and 33 Rows = 4” square in Cable Pattern, blocked.
19 Sts and 26 Rows = 4” square in St st, blocked

Skills Required
ability to read a chart 
cables 
short rows 
RLI and LLI (lifted increases) 
k2tog 
ssk

$7.50
0 Comments

Makalu

5/7/2014

0 Comments

 
I'd like to introduce Makalu, a cabled henley pullover from the Louet North America Fall 2014 collection.
Picture
Picture
My vision for Makalu was to create a henley with an interesting stitch texture that was relatively easy to knit.  The body is worked in the round from the bottom up, beginning with a cabled rib.  The rib transitions seamlessly into the main cabled stitch pattern.  The body is worked straight with no shaping.  The stitch pattern is actually a wide rib, so the resulting fabric is stretchy and will conform to the body without shaping.  The placket is worked in the cabled rib, with simple yarnover buttonholes.  

Stitches for the sleeves are picked up around the armhole and worked in short rows for the sleeve cap.  This has become my preferred method for sleeves for a few reasons.  Carol Feller's Craftsy class on short rows really took away the mystery of short rows and made me feel confident using them in my designs.  I like to avoid sewing seams, so this method makes for a seam-free sleeve.  I also like the fact that working the sleeves top-down makes the length very adjustable.  I have long arms, so being able to try on a sleeve before binding off is a big advantage for me!

Both my designs for Louet use their Gems Worsted yarn, a light worsted weight merino.  Gems is very soft and smooth with lovely stitch definition.  

Here is more information about the pattern:

Sample shown in 331/2” on 36” bust with 21/2” of negative ease. Cable stitch patterns are written and charted.

Body Circumference: 331/2 (381/2, 43, 46, 491/4, 533/4, 581/2)" 
Length: 24 (241/2, 25, 251/2, 26, 261/2, 27)"

Yarn Requirements 
Louet Gems Worsted (worsted weight) 100% Merino Wool 175 yds per 100g (3.53 oz) skein 
Shown in Willow #55 7 (8, 9, 10, 11, 12, 13) skeins

Needles 
US 6 4 mm circular needle, length to be determined depending  on size of garment 
US 6 4 mm DPNs or desired method to work short circumference

Notions 
Stitch markers 
Stitch holders or waste yarn 
Tapestry needle 
6 (7, 7, 7, 8, 9, 9) ” buttons 
Cable needle 
Sewing needle 
Sewing thread

Skills required: 
working in the round 
short rows 
cables 
k2tog 
ssk 
picking up stitches


$7.50
0 Comments

Louet Fall 2014

5/6/2014

0 Comments

 
What??  Fall???  Yep, Louet was able to publish the lookbook for their Fall 2014 collection pretty darn early, so if you really like to plan ahead you can get started on your fall projects.  I have two patterns to share from this collection.  Both use Louet Gems Worsted, a light worsted weight merino wool yarn.  

Over the next few days I'll publish separate posts for each pattern with all the details, so for now here are a few photos.

Makalu, a cabled henley pullover.
Picture
All photos courtesy of Louet North America
Picture
Sinai, a cabled open front cardigan.
Picture
Picture
More details later this week!  You can see the entire Fall collection in Louet's lookbook here.
0 Comments
    Azalea & Rosebud Knits
    Picture

    Author

    Cassie loves to knit, read and cook.  She sometimes does all three at the same time.

    Picture
    Picture
    Picture
    Visit Azalea & Rosebud Knits's profile on Pinterest.

    Categories

    All
    Books
    Food
    Gardening
    Knitting
    Quilting
    Sewing

    Archives

    May 2017
    December 2016
    November 2016
    August 2016
    May 2016
    April 2016
    March 2016
    February 2016
    January 2016
    December 2015
    November 2015
    October 2015
    September 2015
    August 2015
    July 2015
    June 2015
    May 2015
    April 2015
    March 2015
    February 2015
    January 2015
    December 2014
    November 2014
    October 2014
    September 2014
    August 2014
    July 2014
    June 2014
    May 2014
    April 2014
    March 2014
    February 2014
    January 2014
    December 2013
    November 2013
    October 2013
    September 2013
    August 2013
    July 2013
    June 2013
    May 2013
    April 2013
    March 2013
    February 2013
    January 2013
    December 2012
    November 2012
    October 2012
    September 2012
    August 2012

    RSS Feed

Powered by Create your own unique website with customizable templates.