
Double Knitting Tutorial
Double Knitting creates a reversible fabric made up of two layers. It is thick and warm, a perfect choice for winter outerwear and blankets. It is not nearly as difficult as it appears, if you can knit and purl then you can work double knitting!
ABBREVIATIONS:
CO: cast on
k: knit
p: purl
rep: repeat
RS: right side
WS: wrong side
NOTES:
For the purpose of this tutorial, I will refer to the side made of color A as the “Right Side” and the side made of color B the “Wrong Side”. Both sides look equally nice, but this seems to be the easiest terminology to use.
MATERIALS:
Two colors of yarn in the same weight, one light color (A) and one dark color (B).
Appropriate needles for the weight of the yarn. In double knitting, you may need to go down 2-3 needle sizes from what you would normally use.
DIRECTIONS:
Plain Double Knitting
Using color A, CO 20 sts. For my sample in the photos, I used a knitted cast on. Long tail, tubular, and backwards loop cast ons may all be used. Experiment and see what kind of edging you like best.
Row 1 (RS): *with both yarns in back of work, k1 with color A. Bring both yarns between the needles to the front of the work and p1 with color B. Rep from * to end of row.
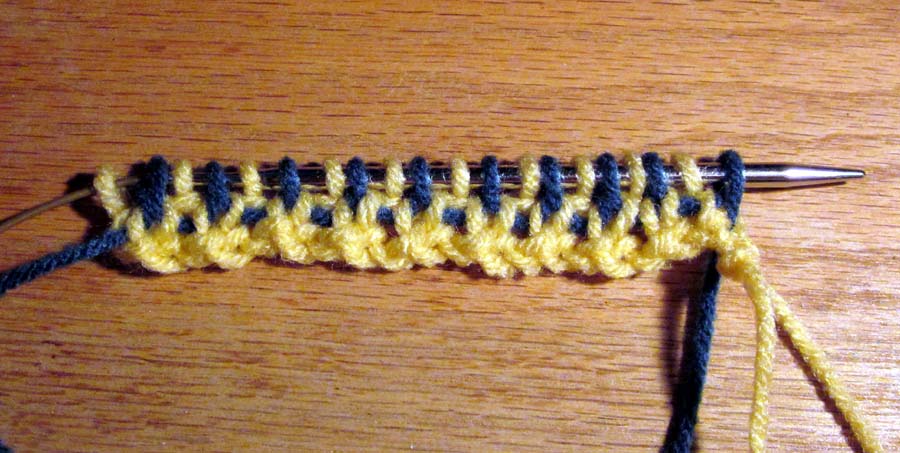
First row is complete, ready to work Row 2
Row 2 (WS): The first st is to be worked with color B. Bring up color B underneath color A, effectively twisting the yarns. This is very important, it will create the closed edge at the side of the fabric. *With both yarns in back of work, k1 with color B. Bring both yarns between the needles to the front of the work and p1 with color A. Rep from * to end of row.

Bring color B underneath color A to twist the yarns
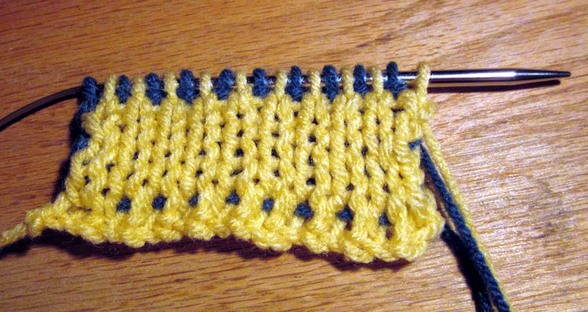
Repeat Rows 1-2 a few more times until you feel comfortable working in Double Knitting. As you will see, all the knit stitches create one layer of fabric and all the purl stitches create the other layer of fabric. The color A layer will be the Right Side and the color B layer will be the Wrong Side. The picture below shows the Right Side.
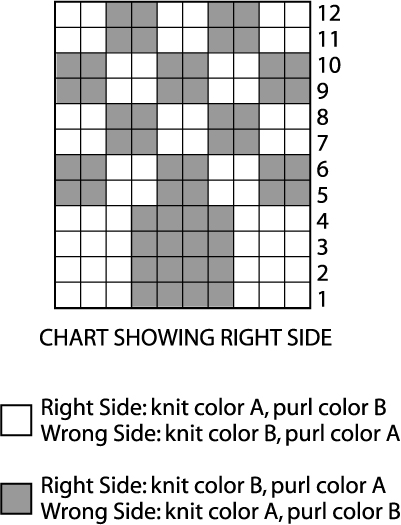
Now we will begin working a charted design. When working from a chart in Double Knitting, it is best to think of each square in the chart as a pair of stitches, one knit and one purl. The chart will show the “Right Side” for all rows.

Let’s begin the first row of the chart. Continue to twist the yarns together at the edge and bring both yarns to the front and back of the work as necessary.
The first three squares show color A. *k1 with color A, p1 with color B* three times. The next four squares show color B. *k1 with color B, p1 with color A* four times. The last three squares show color A. *k1 with color A, p1 with color B* three times.
Row 2 is worked as it appears on the needle. *k1 with color B, p1 with color A* three times. *k1 with color A, p1 with color B* 4 times. *k1 with color B, p1 with color A* three times.
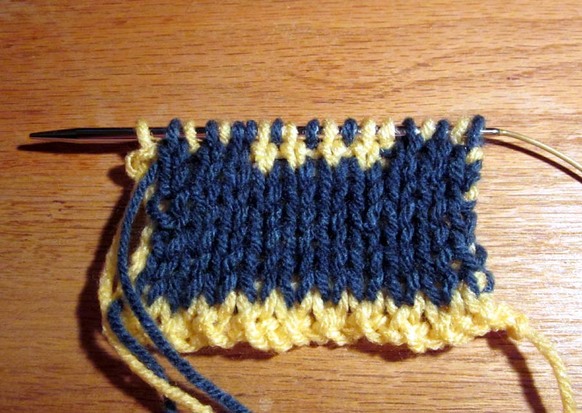
Continue working all rows of the chart. See below for photos of the Right Side and Wrong Side after all rows of the chart are worked.
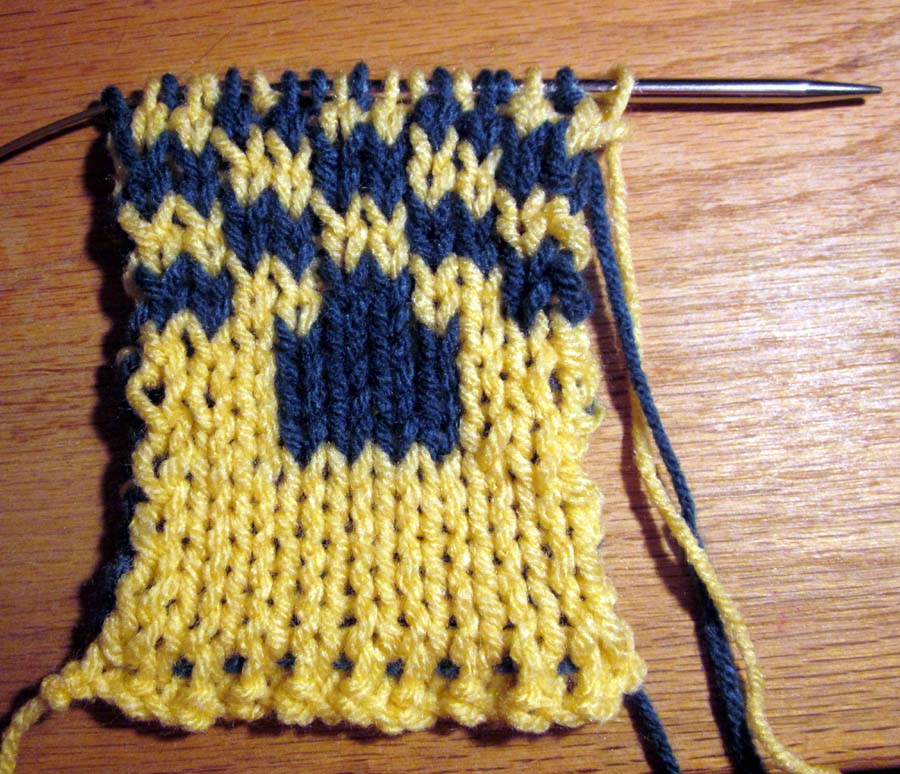
Right Side
|
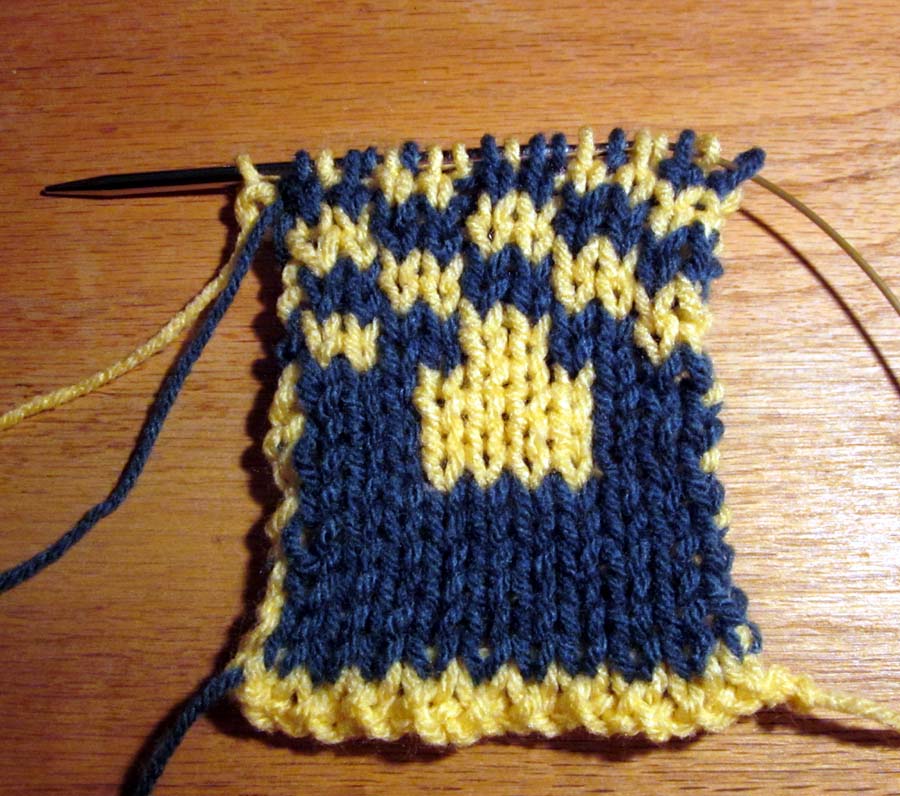
Wrong Side
|
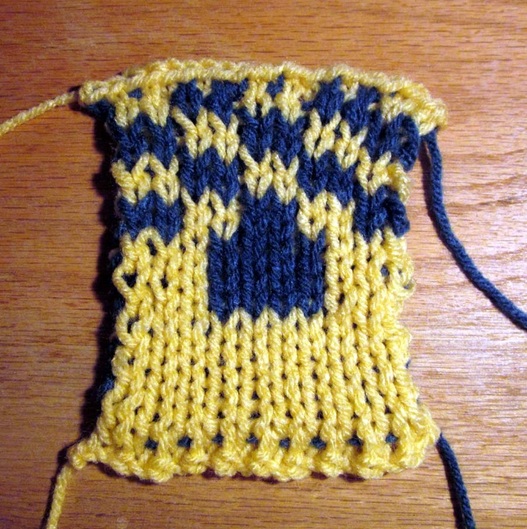
Binding Off
Simple Bind Off: Using color A, k1. *k1, pass first st on right ndl over second st. Rep from * until all sts are bound off.
K2tog Bind Off: Using color A, k2tog. *k2tog, pass first st on right ndl over second st. Rep from * until all sts are bound off.
Try both bind offs and see which one is more appealing to you. In the photo I used the Simple Bind Off.
You can download this tutorial in pdf form below.
| basic_double_knitting_instructions.pdf |
