Azalea and Rosebud Knits
  • Blog
  • Patterns
    • Hats >
      • Roelle Hat
      • Winterset Hat
      • Design Your Own Hat
      • Valentine Cables Hat
      • Kilbourne Hat
      • Etoile Hat
      • Glenrowan Hat
      • Button box cloche
      • Adora Hat
      • Aster Hat
      • Argyle Cabled Beret
      • Zoey Star Beret
      • Cairo Hat
      • Honeycomb Hive Hat
      • Lakkos Cloche
    • Pullovers & Cardigans >
      • Noemy Pullover
      • Yvaine Cardigan
      • Daiva Cardigan
      • Trail Henley
      • Salisa Cardigan
      • Thara Cardigan
      • Dealla Cardigan
      • Shiloh Sweater
      • Katrina Pullover
      • Liana Cardigan
      • Jocasta Pullover
      • Edythe Pullover
      • Ripple Edge Cardigan
      • Kaleidoscope Pullover
      • Sunsine & Rain Henley
      • Begonia Pullover
      • Climbing Rose Henley
      • Irisa Cardigan
      • Makalu
      • Sinai
      • Sand Dollar Cardigan
      • Nopales
      • Lava Rock Cardigan
      • Sharee Cardigan
      • Annalise Pullover
      • Starbrook Pullover
      • Rosemary Cardigan
      • Alison Pullover
      • Edelweiss Cardigan
      • Minnette Pullover
      • Erte Cardigan
      • Nocturnal Pullover
      • Morrison Cardigan
      • Wessex Cardigan
      • Valhalla
      • Leftovers for dinner
    • Tees & Tanks >
      • Cowesett Tee
      • Janesse Pullover
      • Kayleen Pullover
      • Tiye
      • Dahshur
      • Rhodora
      • Jacaranda Tunic
      • Sakura Tee
      • Sunburst Tee
      • Lindell Tee
      • Adeline Camisole
    • Vests & Shrugs >
      • Elephant Vest
      • Elephant Safari Children's Vest
      • Rimrock Vest
      • Bartram Vest
      • Karnak Vest
      • Dark Lotus Shrug
      • Lancero Vest
      • Aster Vest
      • Olexa Vest
      • Morocco Vest
      • Loretto Vest
      • Camellia Shrug
    • Shawls >
      • Nadina Shawl
      • Janelle Shawlette
      • Nile Valley Shawl
      • Ciara Shawl
      • Emmylou Shawl
      • Graciella Shawl
      • Djoser shawl
      • Desert Waves Scarf and Shawl
      • Blackberry Mist Shawl
      • Mariposa Shawl
      • Technidream Shawl
      • Log Cabin Shawl
      • Rosana Shawl
      • Siren Shawl
    • Scarves & Cowls >
      • Zohra Cowl
      • Esna Cowl
      • Avery
      • Lavienne Scarf
      • Joselyn Cowl
      • Jayda Cowl
      • Raissa Cowl
      • Rosewood Cowl
      • Lilka Scarf
      • Hoptree Scarf
    • Gloves >
      • Roelle Gloves
      • June Mitts
      • Cranberry Mitts
      • Cabled Heart Fingerless Gloves
    • Skirts >
      • Lucine Skirt
    • Jewelry & Other Accessories >
      • Inez Necklace
      • Bettina Headwrap
      • Saqqara Necklace
      • Endira Necklace
      • Lapis Cuff
      • Athena Headband
    • Stash-busting
  • Tutorials
    • Entrelac Tutorial
    • Double Knitting tutorial
    • Honeycomb Cables without a cable needle
    • Twisted stitches tutorial: k1tbl & p1tbl
  • eBooks
  • About
  • Contact

Terrarium

7/23/2013

0 Comments

 
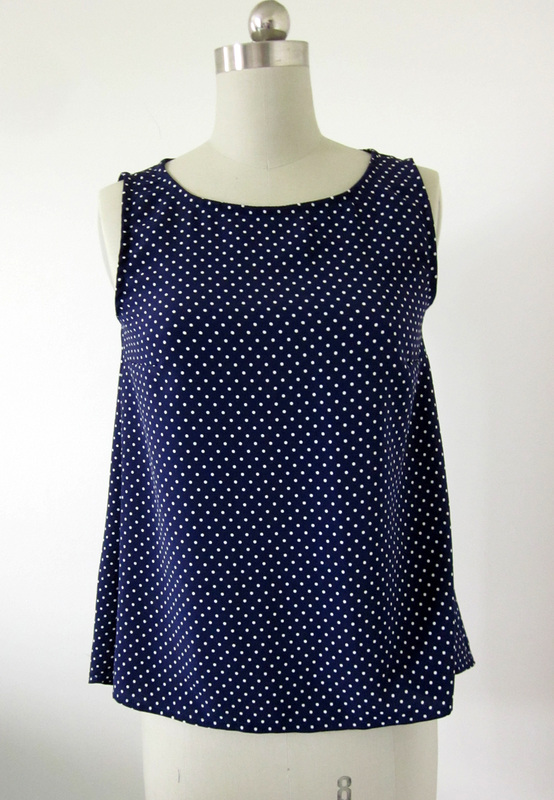
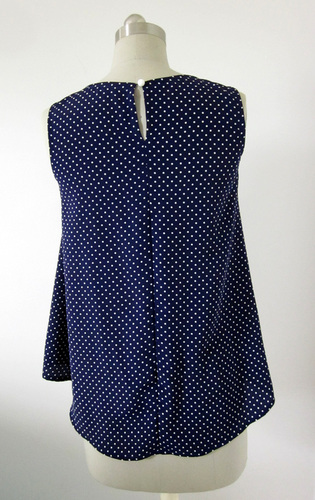
I really don't need any more hobbies; I seem to have far too many already.  Knitting takes up most of my crafting time, and I'm trying to squeeze in more sewing.  Spinning and weaving seem to be completely on the back burner, much to my dismay.  So every time I come across a new craft I think to myself, oh someday but not today....  

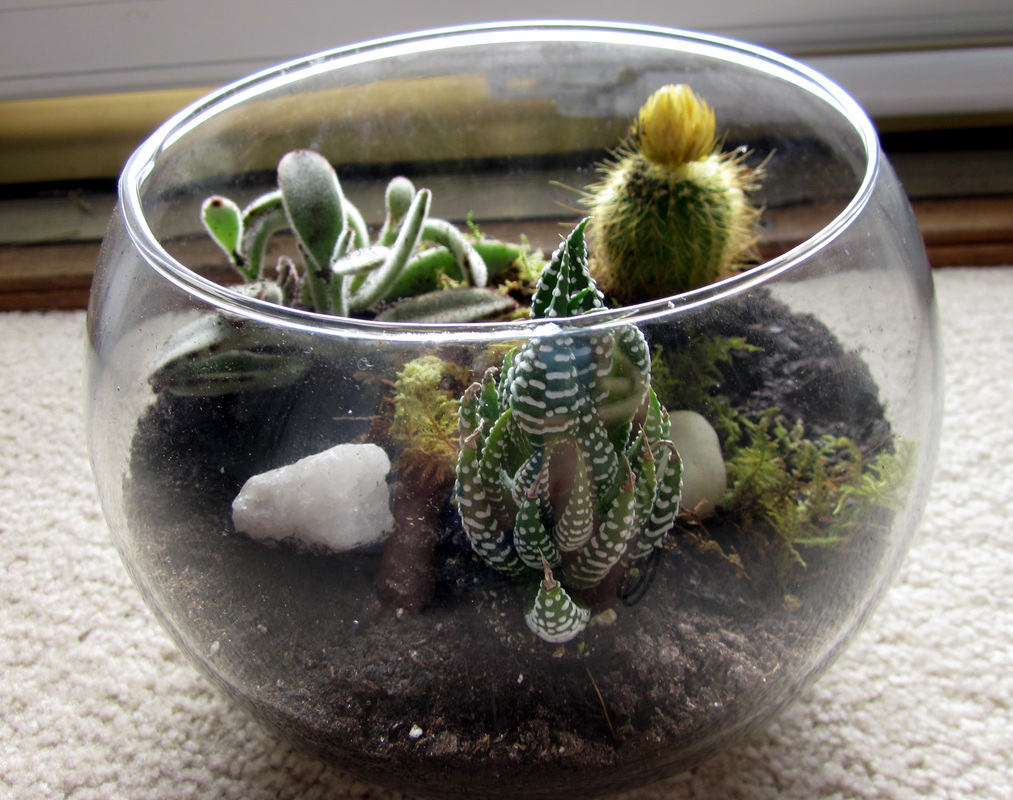
When I was a kid we used to get a lot of catalogs in the mail, and for some reason among them was the Smithsonian catalog.  Not sure why, because we'd never been to the Smithsonian.  But I used to read through it and circle all the things I wanted.  Along with a Roman garnet ring and Chinese silk scarves, one of the things circled was a terrarium.  I thought they were really pretty, like a little miniature fairy world inside a glass container.  The years passed, and I continued to admire terrariums every time I saw one, but never bought one for one reason or another.  Then I got the current issue of Mary Jane's Farm and, along with lots of interesting articles and recipes, found an article on how to maker a terrarium.  Well, I knew I was doomed; I had to make one.  

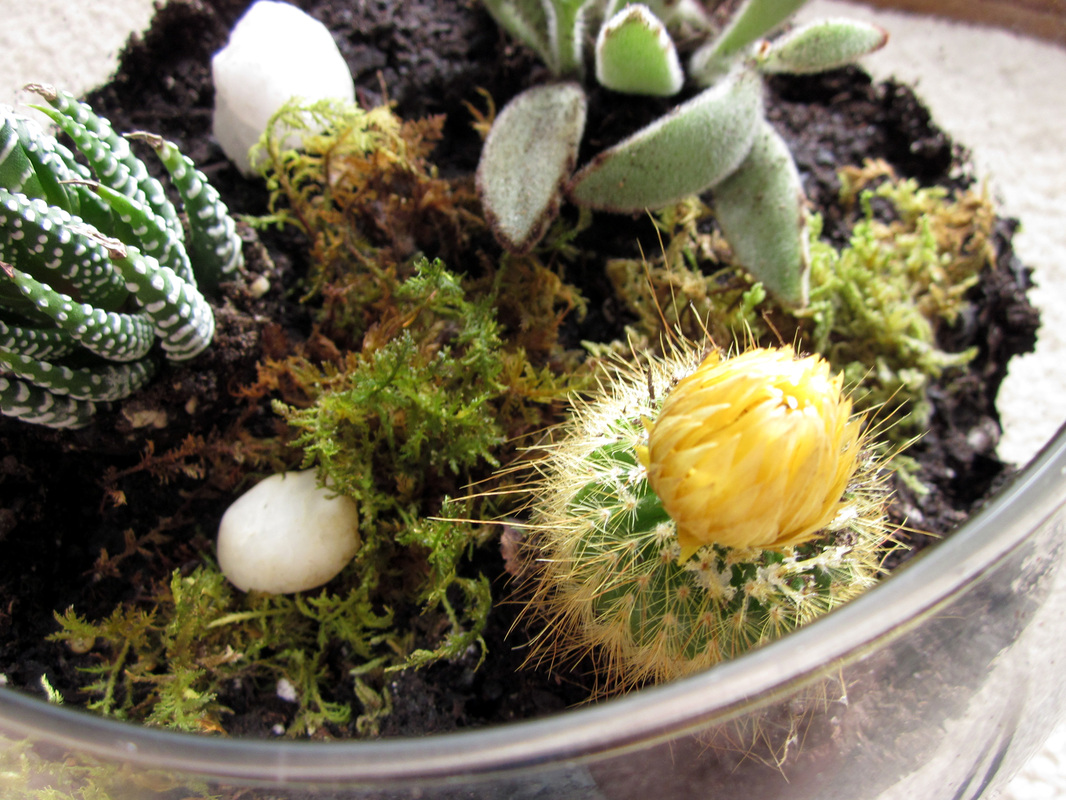
I went to a thrift store looking for curtains, but instead found the perfect glass bowl for my terrarium.  Of course, my next stop was Home Depot and I came home with all the plants and supplies I needed.  The terrarium was very quick to make and pretty easy, except for sticking myself on the cactus spines.  But other than sore fingers, I was quite happy with the result.  I grew up in a desert, and every time I'd see the cactus and succulents at Lowes or Home Depot I'd get a little homesick.  Now I have a little bit of desert on my coffee table.
Picture
Picture
I still have lots of leftover gravel, soil and moss, so I think I will be making more in the future.  Now I just need to take another trip to the beach and collect a few seashells.  If I'm not careful, I'll soon find myself in a house full of terrariums!
0 Comments

New pattern: Ciara Shawl

7/23/2013

0 Comments

 
Picture
Picture
Picture
Picture
I would like to introduce Ciara Shawl, a lace shawl worked in a beaded lace pattern of diamonds on a background of Stockinette stitch. It is worked in three sections, creating a shape that drapes nicely over the shoulders. The size is easily adjusted by repeating the diamond lace pattern.  A beaded picot bind off creates a short and delicate fringe.

I have several books on Estonian lace shawls, and have been oogling this diamond lace stitch pattern for awhile.  After designing (and wearing!) my Mariposa Shawl, I have been wanting to create another 3-section shawl.  I combined the two ideas, created a lace border, and BAM here is Ciara.  

Here are all the pattern particulars:

FINISHED MEASUREMENTS
34” wide and 17.5” long at the center back after blocking.  Shawl can be made larger by repeating the diamond lace pattern.

MATERIALS
Redfish Dyeworks Spun Silk 20/2 (100% silk; 450 yds/411 m per 50 g skein); color B46.
Approximate yardage needed: 345 yards

NEEDLES
US #8/5 mm needles
Adjust needle size to get correct gauge.

NOTIONS REQUIRED
tapestry needle to weave in ends
4 stitch markers (plus optional markers for dividing stitch repeats)
321 (about 25 g) size 6/0 seed beads
steel crochet hook size 12 for adding beads
pins for blocking

GAUGE
12 sts and 23 rows = 4” in lace pattern

SKILLS REQUIRED 
ability to read a chart 
adding beads with a crochet hook 
provisional cast on 
picking up stitches 
k2tog 
ssk 
sl 1, k2tog, psso 
yo

$5.00
0 Comments

Sewing Project: Crepe Tank Top

7/21/2013

0 Comments

 
Picture
Picture
Picture
Saturday was the day of sewing!  Along with finishing my Iris shorts, I cut and sewed this tank top.

Pattern:  Simplicity 1693, view F.  I picked out this pattern for several reasons.  First, I wanted a simple woven top that didn't require buttons or a zipper.  Second, I liked that this pattern doesn't use the dreaded neck and armhole facings.  Instead, it uses single fold bias tape.  I much prefer bias tape, as it is less bulky and doesn't flip up in an annoying way.  I really hate facings with a passion, and if I can get away with making my own bias tape I'll do that instead.  Third, some of the other pattern variations have a Peter Pan collar that I love.  Next time I'll make one with sleeves and a collar!

Fabric:  Polyester crepe in navy with ivory polka dots.  I bought this as a one yard remnant years ago and didn't know what to do with it.  I'm wary of working with slippery fabrics, so I'm not even sure why I bought it in the first place.  That is, until I read about this stuff.
Picture
Spray on fabric stabilizer.  I sprayed on two coats and let the fabric dry flat overnight.  When it was dry, my slippery crepe was transformed into a somewhat stiff but very manageable fabric.  What a sigh of relief!  I found this particular spray stabilizer at my local Hancock Fabrics.  I looked at Joann first and didn't find anything like it there.

I really lucked out and was able to fit both pieces across the width of the fabric, so one yard was barely enough to cut out the size 10.  I had to cut the back out upside down, so if this had been a one-way print I would have run short.

The sewing was relatively simple to execute, and I think I owe that to all the helpful advice I've been reading lately on the Coletterie blog.  Just a couple days ago there happened to be a post about sewing bias tape onto an armhole, and I thanked my lucky stars that I read it!  I also made sure to be particularly careful about pressing up the narrow hem on the shirttail.  When I was finished I started jumping up and down, waving my finished tank in front of my husband's face and then modeled it for him.

"Looky looky!!!  This is the best thing I've ever sewn!!"

"Uh, that's nice dear.  It looks... great..."

He wasn't very impressed because the fabric was still very stiff from the stabilizer and I looked like a giant navy triangle.  He has no imagination at all!  After a wash the fabric has returned to it's original drapey state.  

I usually make notes at the end of things I would want to change for next time, but I am happy with this project and don't think I would change anything!
0 Comments

Sewing Project: Iris Shorts

7/20/2013

0 Comments

 
Picture
I promise I am much more tan than this in real life.
Picture
Well, look who decided to horn in on the photoshoot. I see you, Che!
I have finally finished my Iris shorts!  Sheesh, it only took me about a month.  I did the bulk of the sewing in two sewing sessions, but these managed to sit on my table for several weeks just waiting for the final hem.  I had to set them aside for awhile because I was suddenly busy with knitting projects.  There are three important lessons I learned while sewing these shorts:

1.  This is not a race, so take your time.  I tend to be impatient and rush through projects, and all it usually leads to is disappointment.  I took my time with the sewing and even ripped out the zipper several times when it wasn't turning out right.

2.  Pressing and ironing are very different actions, and are not interchangeable.  Learning the difference between the two solved the mystery of why my quilt blocks are skewed and never match up properly.  (And, in case you are wondering, pressing involves putting the iron down on the fabric and lifting it straight up, while ironing involves a back-and-forth motion.)  When sewing, you should only press and never iron because it can distort the fabric and seams.  I learned this from reading the multitude of sewing books that I have been collecting over the past couple of months.  When I decide I want to do something right, I tend to go overboard and buy a lot of reference books.

3.  If you want something to fit, take the time to make a practice muslin, or at the very least measure yourself and your pattern pieces.  I will admit, I didn't make a muslin, but I did measure myself and the pattern pieces carefully.  I determined the best size for me and luckily didn't have to make alterations.  After finishing the shorts, I can now see that I need to curve the center front seem a bit more to get rid of some slight drag lines.  Also, since I have proportionally wide hips, perhaps eliminating the pockets would be a good idea.  I prefer to be slightly modest, especially when it comes to showing off my legs, so I think next time I will also make the shorts a bit longer.

The pattern itself was awesome!  Very clear written instructions and illustrations.  I especially liked the sidebars with tips and links to helpfull tutorials on the Colette website.  Usually when I follow a big-box sewing pattern I find directions that I think are absolutely useless and over-complicated, and I wonder who on earth is coming up with the instructions.   I think Iris is the first pattern where I didn't yell at the instructions and have to When I purchased the Iris pattern, I also bought Crepe (a very pretty retro style dress) and the Colette sewing book.  The book is excellent; along with great sewing and fitting advice, it comes with some very pretty patterns.  I already have some rayon challis that is white with yellow roses for my Crepe dress.  I can't wait to get started!
0 Comments

The Journey of Emmylou and the Ruffle of Doom

7/8/2013

0 Comments

 
Picture
Photos courtesy of Knitscene
Picture
Picture
The Journey of Emmylou and the Ruffle of Doom

Ok, maybe that title is a little overly dramatic.  I have always wanted to design a shawl with a ruffle, and wanted to create something with cables just as a decorative edging instead of allover fabric.  So I designed my cable motif and knit up a swatch with a nice ruffled edge.  I got the approval from Knitscene and set to work with the calculations for my pattern.  After working up the calculations my eyes practically bulged out of my head.  Cast on 884 stitches.  I thought to myself, that can’t possibly be right!  I did the calculations again.  Still the same.  I stared down at my handwritten scribbles to see if I had made some silly error but couldn’t find one.  How could I possibly need to cast on so many stitches for a shawl about 68” wide at the top?  Then I really thought about that ruffle.  I sew occasionally, and whenever I have sewn a ruffle I have started with a very wide piece of fabric then gathered it up at the top into a much narrower width.  Knitting a ruffle is no different; you start off with a very wide piece and make it much narrower.  But who, besides me, would want to cast on so many stitches?  I made another swatch with a smaller ruffle, but it just didn’t look right.  So now I had a dilemma.  Do I sacrifice the integrity of the design to make a smaller (and perhaps more appealing?) number of cast on stitches?  Or do I keep it the way I like it and encourage knitters to slog through the cast on and first couple of rows? 

I did a quick search on Ravelry for ruffled shawls.  I thought I couldn’t possibly be the first person to think that a ruffle would look fabulous at the bottom of a shawl.  I came across a free pattern of a lovely shawl worked in laceweight yarn that had a very full ruffle at the bottom.  Since it was free I was able to look at the stitch counts.  Unlike my pattern, this one was worked from the top down, so the ruffle was the last part worked.  That ruffle had an ending stitch count of over 1000 stitches.  Yikes.  Well, then I didn’t feel so bad.  There were quite a few projects linked to this pattern, so I started looking at the project notes to see if there were any complaints about working such a large number of stitches.  I didn’t read all the notes, but from what I saw there wasn’t a single complaint.  I decided it was possible, and hopefully there are knitters out there willing to work through a few seemingly endless rows to end up with a lovely result. 

So I went for it and kept my design just the way it was.  Yes, the cast on was boring.  I worked on it over the span of a few evenings while watching Merlin on Netflix.  I laughed to myself and thought, well at least I didn’t require a long tail cast on for so many stitches!  I made little loops of yarn (a replacement for removable stitch markers) and placed them every 50 stitches so that I didn’t lose count.  Yes, the first two rows were boring.  But then, on the third row I did the first set of decreases and I thought, hey this isn’t too bad.  By the end of the ruffle I had decreased over 300 stitches and it wasn’t bad at all.  If you have ever worked a shawl from the bottom up, it is somewhat rewarding to get closer and closer to the end because your rows get shorter and shorter.  Once you finish the border section, the body of the shawl works up amazingly fast since it is worked in short rows.  In the end, I realized that I used up about 700 yards of yarn.  That’s less yarn than a sweater, and a pretty typical amount of yarn for a big shawl.  Emmylou is a lesson in perseverance.  I hope you love the design as much as I do, and are willing to work through those first few rows to get to the end result.

Here are a couple of my photos of Emmylou
Picture
Picture
0 Comments

What We Love vs What We Wear

7/5/2013

1 Comment

 
I recently started reading a sewing blog, The Coletterie, and found this post really interesting.  Sarai writes about being attracted to blue fabrics (and having a large stash of them) when in reality she wears lots of neutral colors.  It made me think about something that has been in the back of my mind for awhile.  I tend to design things I love, but they are not necessarily things I would wear often.  I love designing with lace and have made quite a few shawls, but they hardly ever get worn.  I spend most of my days up to my elbows in garden soil, yarn, or bread dough, and none of those things mix well with a lacy alpaca shawl.  

Do you knit what you love to wear?  Or do you knit things you aspire to wear? I think my love of lace shawls stems from my love of dressing up in formal gowns and sparkly jewelry.  But I hardly ever have the occasion to dress up, so maybe it is all just wishful thinking.

I'm starting to work on my Fall designs (as always, a bit late to the game!) and I have decided I'm going to make at least two sweaters that I will wear on a regular basis.  I almost want to post a sign up in my office that says DESIGN WHAT YOU WILL WEAR.  It seems so simple, but actually somewhat difficult for me!  Sadly most of the sweaters I have designed have gone off to magazines and I don't get to see them again. But I'm changing; last night I cast on for a cardigan that I dreamed of over a year ago.  The design has gone through several yarn and stitch pattern changes, but the heart of the design has stayed the same.  Easy to wear silhouette with an interesting stitch pattern.  In only a couple hours I have the back piece knitted up to the waist, so hopefully this one will fly off the needles.

Back to things I love but don't wear often, here is a new design in the testing stages.  I've had this laceweight blue silk yarn in my stash for awhile, waiting patiently for just the right design.  I designed a beaded lace shawl worked in three sections.  It uses a lovely EstoniaHere is a sneak peek of Ciara Shawl.
Picture
Picture
1 Comment

Rainbow Quilt

7/2/2013

0 Comments

 
I will readily admit that I am not a very good quilter.  Before beginning the quilt I am about to describe, I had only successfully completed one quilt.  I have two others in various stages of completion, which will probably never be finished.  Just like my sewing, spinning and crocheting, I don't quilt often enough to be very good at it.  There just aren't enough hours in the day!

But on to the story.  I have a friend who was about 6 months pregnant when I met her and just recently gave birth to her second child.  I don't know why I didn't get the idea sooner, but the week she was due it dawned on me that it would probably be nice to make something for the baby.  Even though it seems popular these days to have a baby shower for every baby, she was more traditional and didn't have one for her second baby.  When she was last at my house she commented how much she liked the quilt I had laying on my sofa, so I decided a quilt would be a nice present for a baby.  

I have a small obsession with buying fat quarters just because they are colorful and pretty to look at.  Now it was time I actually made something with them!!  I get a bit tired of seeing pastel baby stuff and decided to go with bright colors.  I think I even read somewhere that bright colors are thought to give babies a kind of euphoric high, so even a better reason to make something colorful if it will keep a baby entertained.  

I dove into my giant stack of fat quarters and picked out a rainbow of 8 colors.  I had a huge piece of black cotton that I thought would work nicely for the backing, but in my head I could picture my mother saying to me (in a pearl-clutching sort of way) "Black for A BABY??"  Um... Yes?  I didn't think it would look right with another color, and anything white for a baby is just asking for disaster, so here's hoping my friends wouldn't think it weird for a black backed quilt.  

Since my quilting skills are lacking, I wanted something easy to sew.  I decided on just plain squares with the colors laid out into a diagonal gradient.  I used a craft size batting (36"x45") and cut out 5" squares.  Here they are all laid out on the carpet.
Picture
See that quilted pillow in the corner of the pillow?  That's what I WISH my quilting looked like.  But, alas, my mother is a far better quilter than I.  Looking back, I should have picked less busy prints for the light blue and aqua, but oh well.  

While I was sewing, I tried to channel Eleanor Burns of Quilt in a Day.  I love watching her show and how easy she makes it look.  I didn't fling any scraps over my shoulder like she does though.  

After careful pinning and only one sewing mishap, I managed to sew the whole top in about 3 hours.  I cut out the backing and made the quilt sandwich on my newly swept kitchen floor.  Here it is all basted with pins and taped to the floor.
Picture
I'm sorry the photo is poorly lit and rather blurry.  I was in a hurry to get this quilt finished in one day, and just snapped a few photos with my phone.  

Although I do have a walking foot and darning foot, my machine quilting is still rather lousy so I decided to just tie this quilt.  I used purple embroidery floss that perfectly matched the purple fabric.

For the binding, I just folded the backing onto the front and pressed it under.  The finished 'binding' was about 1/2".  It took several tries and a youtube video for me to remember how to attach the walking foot onto my machine, but in the end it did a nice job sewing down the binding. 
Picture
And here it is!  I think the black looks nice as a border.  I went down to the hospital and delivered the quilt to my friends and they loved it.  Nothing quite like a soft quilt to snuggle in, no matter how old you are!
0 Comments

Designing the Rosemary Cardigan

7/1/2013

1 Comment

 
Picture
Picture
Picture
Picture

1 Comment
    Azalea & Rosebud Knits
    Picture

    Author

    Cassie loves to knit, read and cook.  She sometimes does all three at the same time.

    Picture
    Picture
    Picture
    Visit Azalea & Rosebud Knits's profile on Pinterest.

    Categories

    All
    Books
    Food
    Gardening
    Knitting
    Quilting
    Sewing

    Archives

    May 2017
    December 2016
    November 2016
    August 2016
    May 2016
    April 2016
    March 2016
    February 2016
    January 2016
    December 2015
    November 2015
    October 2015
    September 2015
    August 2015
    July 2015
    June 2015
    May 2015
    April 2015
    March 2015
    February 2015
    January 2015
    December 2014
    November 2014
    October 2014
    September 2014
    August 2014
    July 2014
    June 2014
    May 2014
    April 2014
    March 2014
    February 2014
    January 2014
    December 2013
    November 2013
    October 2013
    September 2013
    August 2013
    July 2013
    June 2013
    May 2013
    April 2013
    March 2013
    February 2013
    January 2013
    December 2012
    November 2012
    October 2012
    September 2012
    August 2012

    RSS Feed

Powered by Create your own unique website with customizable templates.